[root@desk mythcat]# rpm --rebuilddb
warning: waiting for transaction lock on /var/lib/rpm/.rpm.lock
^C
[root@desk mythcat]# rm /var/lib/rpm/.rpm.lock
rm: remove regular empty file '/var/lib/rpm/.rpm.lock'? y
[root@desk mythcat]# rpm --rebuilddb
...
[root@desk mythcat]# dnf clean all
...
Waiting for process with pid 2128 to finish.
^CKeyboardInterrupt: Terminated.
[root@desk mythcat]# kill  -9 2128
[root@desk mythcat]# dnf clean all
95 files removed
Tuesday, January 28, 2020
Fedora 31 : Can be better? part 004.
Another issue on Fedora can be linked to the management of transactions to avoid transaction lock.
Let's see how can be fixed:
Friday, January 24, 2020
Fedora 31 : The twa web auditor tool.
This tool comes with a good intro:
A tiny web auditor with strong opinions.
The tool named twa takes one domain at a time and use these dependencies: bash 4, curl, dig, jq, and nc, along with the POSIX system.
The project can be found at GitHub repository but I can be install easy on Fedora 31 distro:
TYPE(domain): explanation where TYPE is one of PASS, MEH, FAIL, UNK, SKIP, and FATAL., see the output example:
PASS: The test passed with flying color.
MEH: The test passed, but with one or more things that could be improved.
FAIL: The test failed and should be fixed.
UNK: The server gave us something we didn't understand.
SKIP: The server gave us something we understood, but that we don't handle yet.
FATAL: A really important test failed, and should be fixed immediately.
Another feature is scoring.
The score format is this: npasses nmehs nfailures nunknowns nskips totally_screwed.
Let's see one example:
The tool named twa takes one domain at a time and use these dependencies: bash 4, curl, dig, jq, and nc, along with the POSIX system.
The project can be found at GitHub repository but I can be install easy on Fedora 31 distro:
[root@desk mythcat]# dnf install twa.noarch
Last metadata expiration check: 0:06:08 ago on Fri 24 Jan 2020 01:57:53 PM EET.
Dependencies resolved.
================================================================================
 Package       Architecture     Version                  Repository        Size
================================================================================
Installing:
 twa           noarch           1.8.0-3.fc31             fedora            18 k

Transaction Summary
================================================================================
Install  1 Package

Total download size: 18 k
Installed size: 30 k
Is this ok [y/N]: y
Downloading Packages:
twa-1.8.0-3.fc31.noarch.rpm                      10 kB/s |  18 kB     00:01
--------------------------------------------------------------------------------
Total                                           6.7 kB/s |  18 kB     00:02
Running transaction check
Transaction check succeeded.
Running transaction test
Transaction test succeeded.
Running transaction
  Preparing        :                                                        1/1
  Installing       : twa-1.8.0-3.fc31.noarch                                1/1
  Running scriptlet: twa-1.8.0-3.fc31.noarch                                1/1
  Verifying        : twa-1.8.0-3.fc31.noarch                                1/1

Installed:
  twa-1.8.0-3.fc31.noarch

Complete![mythcat@desk ~]$ twa google.com
FAIL(google.com): TWA-0102: HTTP redirects to HTTP (not secure)
FAIL(google.com): TWA-0205: Strict-Transport-Security missing
MEH(google.com): TWA-0206: X-Frame-Options is 'sameorigin', consider 'deny'
FAIL(google.com): TWA-0209: X-Content-Type-Options missing
FAIL(google.com): TWA-0210: X-XSS-Protection is '0'; XSS filtering disabled
FAIL(google.com): TWA-0214: Referrer-Policy missing
FAIL(google.com): TWA-0219: Content-Security-Policy missing
FAIL(google.com): TWA-0220: Feature-Policy missing
PASS(google.com): Site sends 'Server', but probably only a vendor ID: gws
PASS(google.com): Site doesn't send 'X-Powered-By'
PASS(google.com): Site doesn't send 'Via'
PASS(google.com): Site doesn't send 'X-AspNet-Version'
PASS(google.com): Site doesn't send 'X-AspNetMvc-Version'
PASS(google.com): No SCM repository at: http://google.com/.git/HEAD
PASS(google.com): No SCM repository at: http://google.com/.hg/store/00manifest.i
PASS(google.com): No SCM repository at: http://google.com/.svn/entries
PASS(google.com): No environment file at: http://google.com/.env
PASS(google.com): No environment file at: http://google.com/.dockerenv
PASS(google.com): No config file at: http://google.com/config.xml
PASS(google.com): No config file at: http://google.com/config.json
PASS(google.com): No config file at: http://google.com/config.yaml
PASS(google.com): No config file at: http://google.com/config.yml
PASS(google.com): No config file at: http://google.com/config.ini
^C
TYPE(domain): explanation where TYPE is one of PASS, MEH, FAIL, UNK, SKIP, and FATAL., see the output example:
PASS: The test passed with flying color.
MEH: The test passed, but with one or more things that could be improved.
FAIL: The test failed and should be fixed.
UNK: The server gave us something we didn't understand.
SKIP: The server gave us something we understood, but that we don't handle yet.
FATAL: A really important test failed, and should be fixed immediately.
Another feature is scoring.
The score format is this: npasses nmehs nfailures nunknowns nskips totally_screwed.
Let's see one example:
[mythcat@desk ~]$ twa google.com | tscore
20 37 2 7 0 0 0Tuesday, January 14, 2020
Fedora 31 : Install Yii framework.
Today I will show you how to install the Yii framework:
Yii is a fast, secure, and efficient PHP framework. Flexible yet pragmatic. Works right out of the box. Has reasonable defaults.
First, let's install the PHP , see the official webpage.
Fedora for PHP development.

Yii is a fast, secure, and efficient PHP framework. Flexible yet pragmatic. Works right out of the box. Has reasonable defaults.
First, let's install the PHP , see the official webpage.
Fedora for PHP development.
[mythcat@desk ~]$ sudo dnf install php-cli
...
Is this ok [y/N]: y
Downloading Packages:
(1/2): php-common-7.3.13-1.fc31.x86_64.rpm      794 kB/s | 760 kB     00:00
(2/2): php-cli-7.3.13-1.fc31.x86_64.rpm         2.2 MB/s | 2.8 MB     00:01
--------------------------------------------------------------------------------
Total                                           1.6 MB/s | 3.5 MB     00:02
Running transaction check
Transaction check succeeded.
Running transaction test
Transaction test succeeded.
Running transaction
  Preparing        :                                                        1/1
  Installing       : php-common-7.3.13-1.fc31.x86_64                        1/2
  Installing       : php-cli-7.3.13-1.fc31.x86_64                           2/2
  Running scriptlet: php-cli-7.3.13-1.fc31.x86_64                           2/2
  Verifying        : php-cli-7.3.13-1.fc31.x86_64                           1/2
  Verifying        : php-common-7.3.13-1.fc31.x86_64                        2/2

Installed:
  php-cli-7.3.13-1.fc31.x86_64          php-common-7.3.13-1.fc31.x86_64

Complete![mythcat@desk ~]$ sudo dnf install phpunit composer
...
Complete![mythcat@desk ~]$ sudo dnf install php-mysqli
...
Installed:
php-mysqlnd-7.3.13-1.fc31.x86_64
Complete![mythcat@desk ~]$ sudo php --server localhost:8080 --docroot .
PHP 7.3.13 Development Server started at Tue Jan 14 21:58:19 2020
Listening on http://localhost:8080
Document root is /home/mythcat
Press Ctrl-C to quit.
[Tue Jan 14 21:58:40 2020] [::1]:32988 [404]: / - No such file or directory
[Tue Jan 14 21:58:40 2020] [::1]:32990 [404]: / - No such file or directory
[Tue Jan 14 21:58:42 2020] [::1]:33014 [404]: /favicon.ico - No such file or directory
[Tue Jan 14 21:59:48 2020] [::1]:33080 [404]: / - No such file or directory
...[mythcat@desk ~]$ composer
______
/ ____/___ ____ ___ ____ ____ ________ _____
/ / / __ \/ __ `__ \/ __ \/ __ \/ ___/ _ \/ ___/
/ /___/ /_/ / / / / / / /_/ / /_/ (__ ) __/ /
\____/\____/_/ /_/ /_/ .___/\____/____/\___/_/
/_/
Composer version 1.9.1 2019-11-01 17:20:17
Usage:
command [options] [arguments]
Options:
-h, --help Display this help message
-q, --quiet Do not output any message
-V, --version Display this application version
--ansi Force ANSI output
--no-ansi Disable ANSI output
-n, --no-interaction Do not ask any interactive question
--profile Display timing and memory usage information
--no-plugins Whether to disable plugins.
-d, --working-dir=WORKING-DIR If specified, use the given directory as working directory.
--no-cache Prevent use of the cache
-v|vv|vvv, --verbose Increase the verbosity of messages: 1 for normal output, 2 for more verbose output and 3 for debug
Available commands:
about Shows the short information about Composer.
archive Creates an archive of this composer package.
browse Opens the package's repository URL or homepage in your browser.
check-platform-reqs Check that platform requirements are satisfied.
clear-cache Clears composer's internal package cache.
clearcache Clears composer's internal package cache.
config Sets config options.
create-project Creates new project from a package into given directory.
depends Shows which packages cause the given package to be installed.
diagnose Diagnoses the system to identify common errors.
dump-autoload Dumps the autoloader.
dumpautoload Dumps the autoloader.
exec Executes a vendored binary/script.
global Allows running commands in the global composer dir ($COMPOSER_HOME).
help Displays help for a command
home Opens the package's repository URL or homepage in your browser.
i Installs the project dependencies from the composer.lock file if present,
or falls back on the composer.json.
info Shows information about packages.
init Creates a basic composer.json file in current directory.
install Installs the project dependencies from the composer.lock file if present,
or falls back on the composer.json.
licenses Shows information about licenses of dependencies.
list Lists commands
outdated Shows a list of installed packages that have updates available, including
their latest version.
prohibits Shows which packages prevent the given package from being installed.
remove Removes a package from the require or require-dev.
require Adds required packages to your composer.json and installs them.
run Runs the scripts defined in composer.json.
run-script Runs the scripts defined in composer.json.
search Searches for packages.
show Shows information about packages.
status Shows a list of locally modified packages, for packages installed from source.
suggests Shows package suggestions.
u Upgrades your dependencies to the latest version according to composer.json,
and updates the composer.lock file.
update Upgrades your dependencies to the latest version according to composer.json,
and updates the composer.lock file.
upgrade Upgrades your dependencies to the latest version according to composer.json,
and updates the composer.lock file.
validate Validates a composer.json and composer.lock.
why Shows which packages cause the given package to be installed.
why-not Shows which packages prevent the given package from being installed.[mythcat@desk ~]$ composer create-project --prefer-dist yiisoft/yii2-app-basic basic
Installing yiisoft/yii2-app-basic (2.0.31)
- Installing yiisoft/yii2-app-basic (2.0.31): Downloading (100%)
Created project in basic
Loading composer repositories with package information
Updating dependencies (including require-dev)
...
Writing lock file
Generating autoload files
> yii\composer\Installer::postCreateProject
chmod('runtime', 0777)...done.
chmod('web/assets', 0777)...done.
chmod('yii', 0755)...done.
> yii\composer\Installer::postInstall [mythcat@desk ~]$ cd basic/
[mythcat@desk basic]$ ./yii serve
Server started on http://localhost:8080/
Document root is "/home/mythcat/basic/web"
Quit the server with CTRL-C or COMMAND-C.
[Tue Jan 14 22:20:22 2020] [::1]:34072 [200]: /
[Tue Jan 14 22:20:22 2020] [::1]:34074 [200]: /assets/dd70c73/css/bootstrap.css
[Tue Jan 14 22:20:22 2020] [::1]:34076 [200]: /css/site.css
[Tue Jan 14 22:20:22 2020] [::1]:34078 [200]: /assets/afa8d426/jquery.js
[Tue Jan 14 22:20:22 2020] [::1]:34080 [200]: /assets/3235fb02/yii.js
[Tue Jan 14 22:20:22 2020] [::1]:34082 [200]: /assets/dd70c73/js/bootstrap.js
[Tue Jan 14 22:20:23 2020] [::1]:34084 [200]: /index.php?r=debug%2Fdefault%2Ftoolbar&tag=5e1e228626c18 Monday, January 6, 2020
Fedora 31 : Can be better? part 004.
The common question of any Fedora Linux user: Can be better?.
Yes, we can fix some common errors...
This is a common error generated by the GTK on Fedora distro applications:
Yes, we can fix some common errors...
This is a common error generated by the GTK on Fedora distro applications:
[mythcat@desk bin]$ ./studio.sh

(java:12631): Gtk-WARNING **: 11:45:47.061: Unable to locate theme engine in module_path: "murrine",

(java:12631): Gtk-WARNING **: 11:45:47.061: Unable to locate theme engine in module_path: "murrine",

(java:12631): Gtk-WARNING **: 11:45:47.106: Unable to locate theme engine in module_path: "murrine",
...[mythcat@desk ~]$ echo $XDG_CURRENT_DESKTOP
X-Cinnamon[root@desk bin]# dnf install gtk-murrine-engine.x86_64
Last metadata expiration check: 0:45:00 ago on Mon 06 Jan 2020 11:14:27 AM EET.
Dependencies resolved.
...
Installed:
gtk-murrine-engine-0.98.2-17.fc31.x86_64
Complete![mythcat@desk bin]$ ./studio.sh
Jan 06, 2020 12:00:51 PM java.util.prefs.FileSystemPreferences$1 run
INFO: Created user preferences directory.
...Saturday, January 4, 2020
Fedora 31 : Install MongoDB on Fedora 31 distro.
Today I will show you how to install the MongoDB on Fedora 31 distro.
MongoDB is a general-purpose, document-based, distributed database built for modern application developers and for the cloud.
You can see the source code for MongoDb at the GitHub website.
First, you need to create a repository file.
You can see the source code for MongoDb at the GitHub website.
First, you need to create a repository file.
[mythcat@desk ~]$ su
Password:
[root@desk mythcat]# vi /etc/yum.repos.d/mongodb.repo[mongodb-org-4.2]
name=MongoDB Repository
baseurl=https://repo.mongodb.org/yum/redhat/8Server/mongodb-org/testing/x86_64/
gpgcheck=1
enabled=1
gpgkey=https://www.mongodb.org/static/pgp/server-4.2.asc[root@desk mythcat]# dnf search mongodb-org
MongoDB Repository 5.8 kB/s | 6.5 kB 00:01
=========================== Name Exactly Matched: mongodb-org ============================
mongodb-org.x86_64 : MongoDB open source document-oriented database system (metapackage)
=============================== Name Matched: mongodb-org ================================
mongodb-org-shell.x86_64 : MongoDB shell client
mongodb-org-tools.x86_64 : MongoDB tools
mongodb-org-mongos.x86_64 : MongoDB sharded cluster query router
mongodb-org-server.x86_64 : MongoDB database server[root@desk mythcat]# dnf install mongodb-org.x86_64
Last metadata expiration check: 0:01:46 ago on Fri 03 Jan 2020 05:27:49 PM EET.
Dependencies resolved.
==========================================================================================
Package Arch Version Repository Size
==========================================================================================
Installing:
mongodb-org x86_64 4.2.2-0.1.rc1.el8 mongodb-org-4.2 10 k
Installing dependencies:
mongodb-org-mongos x86_64 4.2.2-0.1.rc1.el8 mongodb-org-4.2 14 M
mongodb-org-server x86_64 4.2.2-0.1.rc1.el8 mongodb-org-4.2 25 M
mongodb-org-shell x86_64 4.2.2-0.1.rc1.el8 mongodb-org-4.2 17 M
mongodb-org-tools x86_64 4.2.2-0.1.rc1.el8 mongodb-org-4.2 47 M
Transaction Summary
==========================================================================================
Install 5 Packages
Total download size: 103 M
Installed size: 260 M
Is this ok [y/N]: y
...
From : https://www.mongodb.org/static/pgp/server-4.2.asc
Is this ok [y/N]: y
Key imported successfully
...
Installed:
mongodb-org-4.2.2-0.1.rc1.el8.x86_64 mongodb-org-mongos-4.2.2-0.1.rc1.el8.x86_64
mongodb-org-server-4.2.2-0.1.rc1.el8.x86_64 mongodb-org-shell-4.2.2-0.1.rc1.el8.x86_64
mongodb-org-tools-4.2.2-0.1.rc1.el8.x86_64
Complete![root@desk mythcat]# systemctl start mongod
[root@desk mythcat]# sudo systemctl enable mongod
[root@desk mythcat]# systemctl status mongod
● mongod.service - MongoDB Database Server
Loaded: loaded (/usr/lib/systemd/system/mongod.service; enabled; vendor preset: disabl>
Active: active (running) since Fri 2020-01-03 17:32:36 EET; 17s ago
Docs: https://docs.mongodb.org/manual
Main PID: 9019 (mongod)
Memory: 71.0M
CPU: 890ms
CGroup: /system.slice/mongod.service
└─9019 /usr/bin/mongod -f /etc/mongod.conf
Jan 03 17:32:34 desk systemd[1]: Starting MongoDB Database Server...
Jan 03 17:32:34 desk mongod[9017]: about to fork child process, waiting until server is r>
Jan 03 17:32:34 desk mongod[9017]: forked process: 9019
Jan 03 17:32:36 desk mongod[9017]: child process started successfully, parent exiting
Jan 03 17:32:36 desk systemd[1]: Started MongoDB Database Server.
Jan 03 17:32:47 desk systemd[1]: /usr/lib/systemd/system/mongod.service:16: PIDFile= refe>
...[root@desk mythcat]# netstat -pnltu | grep mongo
tcp 0 0 127.0.0.1:27017 0.0.0.0:* LISTEN 9019/mongod[root@desk mythcat]# mongo
MongoDB shell version v4.2.2-rc1
...
> use admin
switched to db admin
> db.createUser(
... {
... user: "admin",
... pwd: "123",
... roles: [ { role: "userAdminAnyDatabase", db: "admin" } ]
... }
... )
Successfully added user: {
"user" : "admin",
"roles" : [
{
"role" : "userAdminAnyDatabase",
"db" : "admin"
}
]
}> show users
{
"_id" : "admin.admin",
"userId" : UUID("5ca3a1c2-6225-4158-b2bc-e32e5e5de58f"),
"user" : "admin",
"db" : "admin",
"roles" : [
{
"role" : "userAdminAnyDatabase",
"db" : "admin"
}
],
"mechanisms" : [
"SCRAM-SHA-1",
"SCRAM-SHA-256"
]
}[root@desk mythcat]# vim /lib/systemd/system/mongod.service
...
[Unit]
Description=MongoDB Database Server
Documentation=https://docs.mongodb.org/manual
After=network.target
[Service]
User=mongod
Group=mongod
Environment="OPTIONS= --auth -f /etc/mongod.conf"
...[root@desk mythcat]# systemctl daemon-reload
[root@desk mythcat]# systemctl restart mongod
[root@desk mythcat]# systemctl status mongod
● mongod.service - MongoDB Database Server
Loaded: loaded (/usr/lib/systemd/system/mongod.service; enabled; vendor preset: disable>
Active: active (running) since Fri 2020-01-03 17:44:09 EET; 11s ago
Docs: https://docs.mongodb.org/manual
Process: 9272 ExecStartPre=/usr/bin/mkdir -p /var/run/mongodb (code=exited, status=0/SUC>
Process: 9273 ExecStartPre=/usr/bin/chown mongod:mongod /var/run/mongodb (code=exited, s>
Process: 9274 ExecStartPre=/usr/bin/chmod 0755 /var/run/mongodb (code=exited, status=0/S>
Process: 9275 ExecStart=/usr/bin/mongod $OPTIONS (code=exited, status=0/SUCCESS)
Main PID: 9277 (mongod)
Memory: 168.3M
CPU: 1.423s
CGroup: /system.slice/mongod.service
└─9277 /usr/bin/mongod --auth -f /etc/mongod.conf
...Friday, January 3, 2020
Fedora 31 : Test Google locally Apps Script CLI.
The Apps Script CLI, or clasp, is a tool that lets you create, edit, and deploy Apps Script projects locally like Sheets, Docs, Forms, and Slides.
Now you can create a new folder for your project named clasp_code.
Use this command and arrows key to select the type of the project:
You can clone an old project by script_ID.
Use this command into a new folder with the script_ID value from project menu File -> Project properties -> Info -> Script ID.
This will download the project in your current directory.
[mythcat@desk ~]$ mkdir google
[mythcat@desk ~]$ cd google
[mythcat@desk google]$ sudo dnf install nodejs
[sudo] password for mythcat:
Last metadata expiration check: 2:03:50 ago on Fri 03 Jan 2020 11:37:12 AM EET.
Dependencies resolved.
================================================================================
 Package          Arch        Version                        Repository    Size
================================================================================
Installing:
 nodejs           x86_64      1:12.13.1-1.fc31               updates      413 k
Installing dependencies:
 nodejs-libs      x86_64      1:12.13.1-1.fc31               updates       19 M
 npm              x86_64      1:6.12.1-1.12.13.1.1.fc31      updates      3.4 M
Installing weak dependencies:
 nodejs-docs      noarch      1:12.13.1-1.fc31               updates      2.4 M

Transaction Summary
================================================================================
Install  4 Packages

Total download size: 25 M
Installed size: 132 M
Is this ok [y/N]: y
...
Complete![mythcat@desk google]$ sudo npm install n -g
/usr/local/bin/n -> /usr/local/lib/node_modules/n/bin/n
+ n@6.1.3
added 1 package from 4 contributors in 0.705s
[mythcat@desk google]$ sudo n latest
installing : node-v13.5.0
mkdir : /usr/local/n/versions/node/13.5.0
fetch : https://nodejs.org/dist/v13.5.0/node-v13.5.0-linux-x64.tar.gz
installed : v13.5.0 (with npm 6.13.4)
Note: the node command changed location and the old location may be remembered in your current shell.
old : /usr/bin/node
new : /usr/local/bin/node
To reset the command location hash either start a new shell, or execute PATH="$PATH"
[mythcat@desk google]$ sudo npm i @google/clasp -g
/usr/local/bin/clasp -> /usr/local/lib/node_modules/@google/clasp/src/index.js
npm WARN inquirer-autocomplete-prompt@1.0.1 requires a peer of inquirer@^5.0.0 ||
^6.0.0 but none is installed. You must install peer dependencies yourself.
+ @google/clasp@2.3.0
added 191 packages from 118 contributors in 53.457s [mythcat@desk google]$ clasp
Usage: clasp
disable
help Display help
setting|settings [settingKey] [newValue] Update in .clasp.json
* Any other command is not supported [mythcat@desk google]$ clasp login
Logging in globally...
...Now you can create a new folder for your project named clasp_code.
Use this command and arrows key to select the type of the project:
[mythcat@desk clasp_code]$ clasp create --title "my first project with clasp";
? Create which script? (Use arrow keys)
❯ standalone
  docs
  sheets
  slides
  forms
  webapp
  api
...
User has not enabled the Apps Script API. Enable it by visiting
https://script.google.com/home/usersettings then retry. If you enabled this API recently, wait a few minutes for the action to propagate to our systems and retry.You can clone an old project by script_ID.
Use this command into a new folder with the script_ID value from project menu File -> Project properties -> Info -> Script ID.
This will download the project in your current directory.
clasp clone script_ID [mythcat@desk clasp_code]$ clasp open[mythcat@desk clasp_code]$ clasp pull
Warning: files in subfolder are not accounted for unless you set a '.claspignore' file.
Cloned 2 files.
└─ appsscript.json
└─ Code.js
[mythcat@desk clasp_code]$ clasp push
└─ Code.js
└─ appsscript.json
Pushed 2 files.[mythcat@desk clasp_code]$ clasp version "First version"
Created version 1.
[mythcat@desk clasp_code]$ clasp deploy 1 "First deployment"
Created version 2.Sunday, December 29, 2019
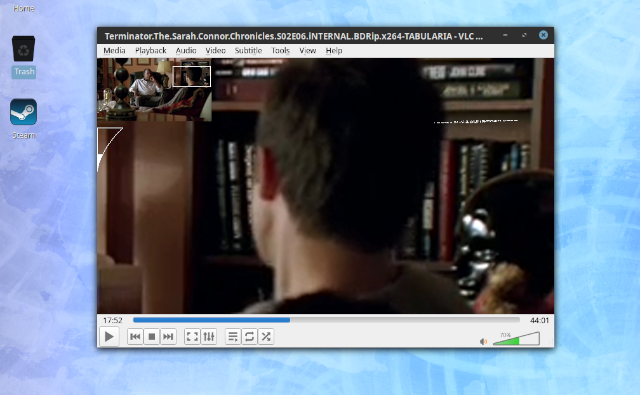
Fedora 31 : The VLC zoom effect!
Zoom, zoom ... zoom
This is not the only effect from the VLC application you can set more.
If you want to use the zoom effect when you play movies with VLC software then use these settings:
Tools -> Effects and Filters (Ctr +E) -> Video Effects -> Interactive Zoom
See the next images:

This is not the only effect from the VLC application you can set more.
If you want to use the zoom effect when you play movies with VLC software then use these settings:
Tools -> Effects and Filters (Ctr +E) -> Video Effects -> Interactive Zoom
See the next images:
Saturday, December 28, 2019
Fedora 31 : Run Minecraft game on Fedora distro.
To install and play the Minecraft game you need to install Java both versions JRE and JDK.
You need to buy or use only redeem codes from Minecraft Java Edition.
I download the Minecraft.tar.gz file and I unarchive into my folder named minecraft-launcher.
After that I run this command to play the game:

You need to buy or use only redeem codes from Minecraft Java Edition.
[root@desk mythcat]# cd minecraft-launcher/
[root@desk minecraft-launcher]# dnf install java-latest-openjdk
[root@desk minecraft-launcher]# dnf install java-latest-openjdk-develI download the Minecraft.tar.gz file and I unarchive into my folder named minecraft-launcher.
After that I run this command to play the game:
[mythcat@desk minecraft-launcher]$ ./minecraft-launcher
which: no java in (/home/mythcat/google-cloud-sdk/bin:/home/mythcat/.local/bin
:/home/mythcat/bin:/usr/local/bin:/usr/bin:/usr/local/sbin:/usr/sbin)
...Thursday, December 26, 2019
Fedora 31 : Install Google Chrome.
Most Linux distributions come with dedicated browsers or Firefox browser.
But if you want to use Google services like Google Optimize then you will need Google Chrome browser.
Today I will show you how to install it in the Linux distribution Fedora 31.
But if you want to use Google services like Google Optimize then you will need Google Chrome browser.
Today I will show you how to install it in the Linux distribution Fedora 31.
[mythcat@desk ~]$ sudo dnf install https://dl.google.com/linux/direct/google-chrome-stable_current_x86_64.rpm
[sudo] password for mythcat:
Last metadata expiration check: 2:29:06 ago on Thu 26 Dec 2019 07:54:58 PM EET.
google-chrome-stable_current_x86_64.rpm              16 MB/s |  59 MB     00:03
Dependencies resolved.
====================================================================================
 Package                   Arch        Version              Repository         Size
====================================================================================
Installing:
 google-chrome-stable      x86_64      79.0.3945.88-1       @commandline       59 M
Installing dependencies:
 liberation-fonts          noarch      1:2.00.5-6.fc31      fedora            8.4 k

Transaction Summary
====================================================================================
Install  2 Packages

Total size: 60 M
Total download size: 8.4 k
Installed size: 210 M
Is this ok [y/N]: y
...
Installed:
  google-chrome-stable-79.0.3945.88-1.x86_64
  liberation-fonts-1:2.00.5-6.fc31.noarch

Complete![mythcat@desk ~]$ google-chrome
google-chrome google-chrome-stable Friday, December 20, 2019
Fedora 31 : Start with tito tool.
If you have some Fedora related project and you want to your output an RPM package, then you can use the tito tool.
This tool comes with the version 0.6.12 and today is finally out!
The team of this software comes with this intro:
Tito is a tool for managing RPM based projects using git for their source code repository.
Let's install it:
Now I can create my .spec file named django_project.spec:
This tool comes with the version 0.6.12 and today is finally out!
The team of this software comes with this intro:
Tito is a tool for managing RPM based projects using git for their source code repository.
Let's install it:
[root@desk mythcat]# dnf search tito
Last metadata expiration check: 1:52:16 ago on Fri 20 Dec 2019 06:10:02 PM EET.
========================== Name Exactly Matched: tito ==========================
tito.noarch : A tool for managing rpm based git projects
============================ Summary Matched: tito =============================
mtdev.x86_64 : Multitouch Protocol Translation Library
mtdev.i686 : Multitouch Protocol Translation Library
mtdev-devel.i686 : Multitouch Protocol Translation Library Development Package
mtdev-devel.x86_64 : Multitouch Protocol Translation Library Development Package
[root@desk mythcat]# dnf install tito.noarch
...
Complete!
[root@desk mythcat]# systemctl daemon-reload [mythcat@desk django]$ tito
Usage: tito MODULENAME --help
Supported modules:
build - Build packages.
init - Initialize directory for use by tito.
release - Build and release to yum repos
report - Display various reports on the repo.
tag - Tag package releases.docs/
mypackage.spec
README
.tito/
src/
test/[mythcat@desk projects]$ cd django/
[mythcat@desk django]$ tito init
Creating tito metadata in: /home/mythcat/projects/django/.tito
- created /home/mythcat/projects/django/.tito
- wrote tito.props
- created /home/mythcat/projects/django/.tito/packages
- wrote /home/mythcat/projects/django/.tito/packages/.readme
- committed to git
Done!Now I can create my .spec file named django_project.spec:
%if 0%{?rhel} > 7 || 0%{?fedora}
%global use_python3 1
%global use_python2 0
%global ourpythonbin %{__python3}
%global our_sitelib %{python3_sitelib}
%else
%global use_python3 0
%global use_python2 1
%if 0%{?__python2:1}
%global ourpythonbin %{__python2}
%global our_sitelib %{python2_sitelib}
%else
%global ourpythonbin %{__python}
%global our_sitelib %{our_sitelib}
%endif
%endif
%{!?our_sitelib: %define our_sitelib %(%{ourpythonbin} -c "from distutils.sysconfig
import get_python_lib; print get_python_lib()")}

Name: django_chart
Version: 0.0.2
Release: 1%{?dist}
Summary: A tool for managing rpm based git projects

License: GPLv2
URL: https://github.com/catafest/django_chart
Source0: https://github.com/catafest/django_chart/archive/django_chart-%{version}-1.tar.gz

BuildArch: noarch
%if %{use_python3}
BuildRequires: python3-devel
BuildRequires: python3-setuptools
Requires: python3-setuptools
Requires: python3-bugzilla
Requires: python3-blessings
Requires: rpm-python3
%else
BuildRequires: python2-devel
BuildRequires: python-setuptools
Requires: python-setuptools
Requires: python-bugzilla
Requires: python-blessings
Requires: rpm-python
%endif
BuildRequires: asciidoc
BuildRequires: docbook-style-xsl
BuildRequires: libxslt
BuildRequires: rpmdevtools
BuildRequires: rpm-build
BuildRequires: tar
BuildRequires: which

%if 0%{?fedora}
# todo: add %%check to spec file in accordance with
# https://fedoraproject.org/wiki/QA/Testing_in_check
BuildRequires: git
BuildRequires: python-bugzilla
BuildRequires: python3-devel
BuildRequires: python3-setuptools
BuildRequires: python3-bugzilla
BuildRequires: rpm-python3
%endif

Requires: rpm-build
Requires: rpmlint
Requires: fedpkg
Requires: fedora-packager
Requires: rpmdevtools
# Cheetah used not to exist for Python 3, but it's what Mead uses.  We
# install it and call via the command line instead of importing the
# previously potentially incompatible code, as we have not yet got
# around to changing this
Requires: /usr/bin/cheetah

%description
django_chart is a project for managing chart with django
git.

%prep
# the weird directory name is because github makes the directory name
# '(projectname)-(tag)', and the tags for django_chart have 'django_chart' in them and
# '-1' on the end...
%setup -q -n django_chart-django_chart-%{version}-1
sed -i 1"s|#!.*|#!%{ourpythonbin}|" bin/django_chart

%build
%{ourpythonbin} setup.py build
# convert manages
a2x -d manpage -f manpage django_chartrc.5.asciidoc
a2x -d manpage -f manpage django_chart.8.asciidoc
a2x -d manpage -f manpage django_chart.props.5.asciidoc
a2x -d manpage -f manpage releasers.conf.5.asciidoc

%install
rm -rf $RPM_BUILD_ROOT
%{ourpythonbin} setup.py install -O1 --skip-build --root $RPM_BUILD_ROOT
rm -f $RPM_BUILD_ROOT%{our_sitelib}/*egg-info/requires.txt
# manpages
%{__mkdir_p} %{buildroot}%{_mandir}/man5
%{__mkdir_p} %{buildroot}%{_mandir}/man8
cp -a django_chartrc.5 django_chart.props.5 releasers.conf.5 %{buildroot}/%{_mandir}/man5/
cp -a django_chart.8 %{buildroot}/%{_mandir}/man8/
# bash completion facilities
install -Dp -m 0644 share/django_chart_completion.sh %{buildroot}%{_datadir}/bash-completion/completions/
django_chart


%files
%doc AUTHORS COPYING
%doc doc/*
%doc %{_mandir}/man5/django_chartrc.5*
%doc %{_mandir}/man5/django_chart.props.5*
%doc %{_mandir}/man5/releasers.conf.5*
%doc %{_mandir}/man8/django_chart.8*
%{_bindir}/django_chart
%{_bindir}/generate-patches.pl
%{_datadir}/bash-completion/completions/django_chart
%dir %{our_sitelib}/django_chart
%{our_sitelib}/django_chart/*
%{our_sitelib}/django_chart-*.egg-info


%changelog
* Fri Dec 20 2019 catafest  0.0.2-1
- new package built with tito

* Fri Dec 20 2019 Catalin George Festila 0.6.12-1 [mythcat@desk django]$ tito tag --debug
Creating output directory: /tmp/tito
Importing tito.tagger.VersionTagger
Using tagger class:
Looking for .spec in /home/mythcat/projects/django
Using file: django_project.spec
Looking for .spec in /home/mythcat/projects/django
Using file: django_project.spec
Command: rpm --eval '%scl'
Status code: 0
Command output: %scl
Command: rpm -q --qf '%{name}
' --eval '%undefine scl' --specfile /home/mythcat/projects/django/django_project.spec 2> /dev/null |
grep -e '^$' -v | head -1
Status code: 0
Command output: django_chart
Command: git config --get user.name
Status code: 0
Command output: catafest
Command: git config --get user.email
Status code: 0
Command output: catalinfest@gmail.com
Getting latest package info from: /home/mythcat/projects/django/.tito/packages/django_chart
Getting latest package info from: /home/mythcat/projects/django/.tito/packages/django_chart
Command: rpm -q --qf '%{version}-%{release}
' --define "_sourcedir /home/mythcat/projects/django" --define 'dist %undefined' --specfile
/home/mythcat/projects/django/django_project.spec 2> /dev/null | grep -e '^$' -v | head -1
Status code: 0
Command output: 0.0.2-1
Tagging new version of django_chart: untagged -> 0.0.2-1
Cargo.toml file not found, this is probably not a Rust project
No destination version file found, skipping.
Command: git add /home/mythcat/projects/django/.tito/packages/django_chart
Status code: 0
Command output:
Command: git add /home/mythcat/projects/django/django_project.spec
Status code: 0
Command output:
Command: git commit -m 'Automatic commit of package [django_chart] release [0.0.2-1].' -m
'Created by command:' -m '/usr/bin/tito tag --debug'
Status code: 0
Command output: [master 3b2d812] Automatic commit of package [django_chart] release [0.0.2-1].
2 files changed, 126 insertions(+)
create mode 100644 .tito/packages/django_chart
create mode 100644 django_project.spec
Command: git tag -m "Tagging package [django_chart] version [django_chart-0.0.2-1] in directory
[./]." django_chart-0.0.2-1
Status code: 0
Command output:
Created tag: django_chart-0.0.2-1
View: git show HEAD
Undo: tito tag -u
Push: git push --follow-tags origin git push && git push origin some-tag-1.0[mythcat@desk django]$ tito build --tgz [--offline]
[mythcat@desk django]$ tito build --srpm [--offline]
[mythcat@desk django]$ tito build --rpm [--offline]Monday, December 9, 2019
Fedora 31 : Can be better? part 003.
Yes! The Fedora distro Linux can be better.
One bad problem for most Fedora users is video drivers.
I have an old NVIDIA graphic card: NVIDIA Corporation GT218 [GeForce 210] (rev a2).
This worked well with the nouveau device driver.
It will be great if the detection and install of the video graphic card will start from the installation process.
Another option is to have a dedicated opensource software for detection and installation of the video card.
Saturday, December 7, 2019
Fedora 31 : Uploading a repo with Fedora.
This is a simple way to upload to the GitHub website your source code.
First, you need to create your repo on your GitHub account using New button from Your repositories on account area.
Fill with the name of your GitHub project and see the link to your project.
In my case, I used the named project django_chart and the link is https://github.com/catafest/django_chart.git.
In your local folder project from Fedora distro use this commands:
(env) [mythcat@desk django]$ git init
(env) [mythcat@desk django]$ git add .
(env) [mythcat@desk django]$ git commit -m "First Commit"
(env) [mythcat@desk django]$ git remote add origin https://github.com/catafest/django_chart.git
(env) [mythcat@desk django]$ git push -f origin master
Username for 'https://github.com': catafest
Password for 'https://catafest@github.com':
Enumerating objects: 8730, done.
Counting objects: 100% (8730/8730), done.
Delta compression using up to 2 threads
Compressing objects: 100% (5056/5056), done.
Writing objects: 100% (8730/8730), 14.12 MiB | 744.00 KiB/s, done.
Total 8730 (delta 2597), reused 8730 (delta 2597)
remote: Resolving deltas: 100% (2597/2597), done.
To https://github.com/catafest/django_chart.git
+ b2c0e70...0746fa8 master -> master (forced update)Wednesday, December 4, 2019
Fedora 31 : Lutris the Open Source gaming platform for Linux.
Lutris is an Open Source gaming platform for Linux. It installs and launches games so you can start playing without the hassle of setting up your games. Get your games from GOG, Steam, Battle.net, Origin, Uplay and many other sources running on any Linux powered gaming machine.
You need to create an account and you can run many games on Linux and multiple platforms, see the official website with games.
The installation process is simple to do on Fedora 31 with DNF tool:
You need to create an account and you can run many games on Linux and multiple platforms, see the official website with games.
The installation process is simple to do on Fedora 31 with DNF tool:
[root@desk mythcat]# sudo dnf install lutris
Last metadata expiration check: 0:06:35 ago on Wed 04 Dec 2019 07:15:23 PM EET.
Dependencies resolved.
======================================================================================
 Package                    Arch       Version                      Repository   Size
======================================================================================
Installing:
 lutris                     x86_64     0.5.3-1.fc31                 fedora      2.0 M
...
Total download size: 129 M
Installed size: 708 M
Is this ok [y/N]: y
...
  llvm-libs-9.0.0-1.fc31.i686           ncurses-libs-6.1-12.20190803.fc31.i686
  python3-evdev-1.1.2-4.fc31.x86_64     unixODBC-2.3.7-5.fc31.x86_64
  vulkan-loader-1.1.114.0-1.fc31.i686

Complete!Saturday, November 23, 2019
Fedora 31 : Can be better? part 002.
If you want to have a USB device with the Fedora distro then the Fedora team comes with this solution, see the webpage.
Now let's make all easier for this issue. Detect your USB device...

Now let's make all easier for this issue. Detect your USB device...
[mythcat@desk ~]$ lsblk
NAME            MAJ:MIN RM   SIZE RO TYPE MOUNTPOINT
...
sdb               8:16   1   984M  0 disk
└─sdb1 8:17 1 983M 0 part [mythcat@desk Downloads]$ sudo fdisk /dev/sdb
Welcome to fdisk (util-linux 2.34).
Changes will remain in memory only, until you decide to write them.
Be careful before using the write command.
Command (m for help): a
Selected partition 1
The bootable flag on partition 1 is disabled now.
Command (m for help): a
Selected partition 1
The bootable flag on partition 1 is enabled now.
Command (m for help): q[mythcat@desk ~]$ sudo umount /dev/sdb[mythcat@desk ~]$ sudo dd if=Fedora-Server-netinst-x86_64-31-1.9.iso of=/dev/sdb
1331200+0 records in
1331200+0 records out
681574400 bytes (682 MB, 650 MiB) copied, 383.766 s, 1.8 MB/s[mythcat@desk ~]$ sudo qemu-system-x86_64 -hda /dev/sdbThursday, November 14, 2019
Fedora 31 : Can be better? part 001.
I started using Fedora distribution several years ago after I tried several distros (Suse, RedHat 6, Debian, Gentoo and many more).
I was pleased with the test and speed.
I must admit that from the first used version 9 (Sulfur) and until now it is very changed and unknown for many users
That's why I decided to present in this series of mini-tutorials called Can be better? various lesser-known aspects that underlie it and its more precise use.
I will not abide by a predetermined order in the use of Fedora distribution.
I will only point to useful information for any Fedora user.
Let's start the first part of this tutorial named Can be better? part 001. with a brief introduction to the Wikipedia page and the official one.
An interesting aspect of Fedora configuration is the file sysctl.conf.
You can read the manual page with this command:
The last parameter named kernel.exec-shield fix NX protection also called Data Execution Prevention (DEP), to prevent buffer stacks from taking down your machine.
You can check this with:
I was pleased with the test and speed.
I must admit that from the first used version 9 (Sulfur) and until now it is very changed and unknown for many users
That's why I decided to present in this series of mini-tutorials called Can be better? various lesser-known aspects that underlie it and its more precise use.
I will not abide by a predetermined order in the use of Fedora distribution.
I will only point to useful information for any Fedora user.
Let's start the first part of this tutorial named Can be better? part 001. with a brief introduction to the Wikipedia page and the official one.
An interesting aspect of Fedora configuration is the file sysctl.conf.
You can read the manual page with this command:
man 8 sysctlvm.overcommit_memory=2
vm.overcommit_ratio=100
kernel.exec-shield=10: heuristic overcommit (this is the default)
1: always overcommit, never check
2: always check, never overcommitThe last parameter named kernel.exec-shield fix NX protection also called Data Execution Prevention (DEP), to prevent buffer stacks from taking down your machine.
You can check this with:
[root@desk mythcat]# grep nx /proc/cpuinfo Sunday, November 10, 2019
Fedora 31 : Use bash script to see all the permissions.
This tutorial will show you how to generate all the permissions using one file named file_test.
[mythcat@desk ~]$ mkdir my_bash_scripts
[mythcat@desk ~]$ cd my_bash_scripts/
[mythcat@desk my_bash_scripts]$ vim all_permissions.sh
[mythcat@desk my_bash_scripts]$ vim all_permissions.sh
[mythcat@desk my_bash_scripts]$ chmod +x all_permissions.sh
[mythcat@desk my_bash_scripts]$ ls
all_permissions.sh#!/bin/sh
#loops through a chmod sequence
count_perm(){
foo=1
touch file_test
while [ "$foo" -ne 7778 ];do
echo $foo >> out
chmod $foo file_test
ls -gG >> out
foo=$(($foo+1))
done
}
count_perm
egrep -v '(all_permissions.sh)|(total)|(out)' out > results
echo "use command cat results to see permissions for file_test."
exit 0[mythcat@desk my_bash_scripts]$ ./all_permissions.sh
...
Try 'chmod --help' for more information.
chmod: invalid mode: ‘7768’
Try 'chmod --help' for more information.
chmod: invalid mode: ‘7769’
Try 'chmod --help' for more information.
use command cat results to see permissions for file_test.
[mythcat@desk my_bash_scripts]$ ls
all_permissions.sh file_test out results[mythcat@desk my_bash_scripts]$ cat out
...
7774
total 2052
-rwxrwxr-x. 1 331 Nov 10 18:22 all_permissions.sh
-rwsrwsr-T. 1 0 Nov 10 18:23 file_test
-rw-rw-r--. 1 1153701 Nov 10 18:23 r
7775
total 2052
-rwxrwxr-x. 1 331 Nov 10 18:22 all_permissions.sh
-rwsrwsr-t. 1 0 Nov 10 18:23 file_test
-rw-rw-r--. 1 1153853 Nov 10 18:23 r
7776
total 2052
-rwxrwxr-x. 1 331 Nov 10 18:22 all_permissions.sh
-rwsrwsrwT. 1 0 Nov 10 18:23 file_test
-rw-rw-r--. 1 1154005 Nov 10 18:23 r
7777
total 2052
-rwxrwxr-x. 1 331 Nov 10 18:22 all_permissions.sh
-rwsrwsrwt. 1 0 Nov 10 18:23 file_test
-rw-rw-r--. 1 1154157 Nov 10 18:23 r[mythcat@desk my_bash_scripts]$ cat results
...
7766
-rwsrwSrwT. 1 0 Nov 10 18:30 file_test
7767
-rwsrwSrwt. 1 0 Nov 10 18:30 file_test
7768
-rwsrwSrwt. 1 0 Nov 10 18:30 file_test
7769
-rwsrwSrwt. 1 0 Nov 10 18:30 file_test
7770
-rwsrws--T. 1 0 Nov 10 18:30 file_test
7771
-rwsrws--t. 1 0 Nov 10 18:30 file_test
7772
-rwsrws-wT. 1 0 Nov 10 18:30 file_test
7773
-rwsrws-wt. 1 0 Nov 10 18:30 file_test
7774
-rwsrwsr-T. 1 0 Nov 10 18:30 file_test
7775
-rwsrwsr-t. 1 0 Nov 10 18:30 file_test
7776
-rwsrwsrwT. 1 0 Nov 10 18:30 file_test
7777
-rwsrwsrwt. 1 0 Nov 10 18:30 file_testFedora 31 : another FASM tutorial with Linux.
Today I wrote another tutorial about FASM and assembly language on my website.
Because I used the Fedora distro I add my tutorial here.
If you want to learn assembly programming for Windows O.S. or Linux with the Intel C.P.U. then you need the FASM tool and this manual.
Today I will show you how to create a file using my Fedora 31 Linux distro and FASM tool.
The name of this file will be new_file.txt.
The assembly program will use INT 0x08 to create the file.
Let's see some octal permissions:
Because I used the Fedora distro I add my tutorial here.
If you want to learn assembly programming for Windows O.S. or Linux with the Intel C.P.U. then you need the FASM tool and this manual.
Today I will show you how to create a file using my Fedora 31 Linux distro and FASM tool.
The name of this file will be new_file.txt.
The assembly program will use INT 0x08 to create the file.
entry _start

filename db "new_file.txt", 0

_start:
    ; create a new file
    mov rax, 8
    mov rbx, filename
    mov rcx, 0011
    int 0x80

    ; use descriptor
    push rax

    ; close the new file
    mov rax, 6
    pop rbx
    int 0x80

    call exit

exit:
    mov rax, 1
    mov rbx, 0
int 0x80>Let's see some octal permissions:
    mov rcx, 000

----------. 1 mythcat mythcat       0 Nov 10 17:40 new_file.txt
    mov rcx, 0001

---------x. 1 mythcat mythcat       0 Nov 10 17:41 new_file.txt
    mov rcx, 0011

------x--x. 1 mythcat mythcat 0 Nov 10 17:43 new_file.txtSaturday, November 9, 2019
Fedora 31 : The new Fedora 31 Linux distro.
I tested today the new Fedora 31.
This new Fedora comes with many features.
One is the Toolbox tool that offers a familiar RPM-based environment for developing and debugging software that runs fully unprivileged using Podman.
Fedora 31 significantly improves the speed of update installation, as packages are now compressed with zstd instead of xz.
This commands let you to upgrading Fedora 30 to Fedora 31.
[root@desk mythcat]# dnf upgrade --refresh
...
[root@desk mythcat]# dnf install dnf-plugin-system-upgrade
...
[root@desk mythcat]# dnf remove xorg-x11-drv-nvidia-340xx-libs-1:340.107-4.fc30.x86_64
...
[root@desk mythcat]# dnf system-upgrade download --releasever=31
...
[root@desk mythcat]# dnf system-upgrade rebootMonday, November 4, 2019
Fedora 30 : How to remove packages without dependency.
In this tutorial, I will show you how to remove packages without dependency.
I have this software named freecad.x86_64 and I want to remove it.
If I use the dnf tool then I got this output:
The next commands will fix and remove the package:
I have this software named freecad.x86_64 and I want to remove it.
If I use the dnf tool then I got this output:
[root@desk mythcat]# dnf remove freecad.x86_64
Dependencies resolved.
==============================================================================
 Package                       Arch   Version                  Repo      Size
==============================================================================
Removing:
 freecad                       x86_64 1:0.18.3-5.fc30.1        @updates 141 M
Removing unused dependencies:
 Coin3                         x86_64 3.1.3-24.fc30            @fedora   11 M
 OCE-foundation                x86_64 0.18.3-4.fc30            @fedora   11 M
 OCE-modeling                  x86_64 0.18.3-4.fc30            @fedora   58 M
 OCE-ocaf                      x86_64 0.18.3-4.fc30            @fedora   11 M
 OCE-visualization             x86_64 0.18.3-4.fc30            @fedora  6.7 M
 SoQt                          x86_64 1.5.0-26.fc30            @fedora  1.0 M
 assimp                        x86_64 3.3.1-19.fc30            @fedora  9.7 M
 boost-python3                 x86_64 1.69.0-8.fc30            @updates 473 k
 dotconf                       x86_64 1.3-20.fc30              @fedora   61 k
 espeak-ng                     x86_64 1.49.2-6.fc30            @fedora  6.6 M
...[root@desk mythcat]# sudo dnf copr enable @freecad/nightly[root@desk mythcat]# vim /etc/dnf/dnf.confThe next commands will fix and remove the package:
[root@desk mythcat]# dnf clean all
86 files removed
[root@desk mythcat]# dnf remove freecad.x86_64
Dependencies resolved.
==============================================================================
 Package            Architecture Version                 Repository      Size
==============================================================================
Removing:
 freecad            x86_64       1:0.18.3-5.fc30.1       @updates       141 M
Removing dependent packages:
 freecad-data       noarch       1:0.18.3-5.fc30.1       @updates       194 M

Transaction Summary
==============================================================================
Remove  2 Packages

Freed space: 335 M
Is this ok [y/N]:
...Sunday, November 3, 2019
Fedora 30 : Introduction to Qt Designer.
Qt Designer is the Qt tool for designing and building graphical user interfaces (GUIs) with Qt Widgets... see the Qt Designer manual webpage.
You can preview your work with Ctrl+R keys.
After you finish with the project then save the file with this name: mytest.ui.
The next command to create your working python file named mytest.py.
Use this command with the -x option creates the main section to the my.py file that will allow us to test quickly whether the GUI looks as we intended.
[root@desk mythcat]# dnf install qt5-designer.x86_64
...
Installed:
  qt5-designer-5.12.5-1.fc30.x86_64
  qt5-qttools-libs-designercomponents-5.12.5-1.fc30.x86_64

Complete![mythcat@desk ~]$ designer-qt5 You can preview your work with Ctrl+R keys.
After you finish with the project then save the file with this name: mytest.ui.
The next command to create your working python file named mytest.py.
Use this command with the -x option creates the main section to the my.py file that will allow us to test quickly whether the GUI looks as we intended.
[mythcat@desk ~]$ pyuic5 -x mytest.ui -o mytest.py[mythcat@desk ~]$ python3 mytest.pyFedora 30 : About Simple Screen Recorder tool.
The Simple Screen Recorder tool can be easily installed on Fedora 30 and provide a GUI interface for recording screen with audio input.
Use the dnf tool to install it:

The tool start with this windows screen, you need to press the Continue button:

The next steps comes with configuration area for your video recorder.
I set and save my new Input profile to record an screen area.
You can use a rectangle, change the size from left to right or select the window to define the area for record video.
I change the Audio input to use my microphone.

The next step let you to set the file , video and audio settings for output. I let all with default settings.
The last step let you to see informations , preview and set the hotkeys.
I can use keyboard to start and stop recorder.

[root@desk mythcat]# dnf install simplescreenrecorder.x86_64
...
Installed:
  simplescreenrecorder-0.3.11-7.fc30.x86_64

Complete!
[mythcat@desk ~]$ echo $XDG_CURRENT_DESKTOP
LXDE
The tool start with this windows screen, you need to press the Continue button:
The next steps comes with configuration area for your video recorder.
I set and save my new Input profile to record an screen area.
You can use a rectangle, change the size from left to right or select the window to define the area for record video.
I change the Audio input to use my microphone.
The next step let you to set the file , video and audio settings for output. I let all with default settings.
The last step let you to see informations , preview and set the hotkeys.
I can use keyboard to start and stop recorder.
Saturday, November 2, 2019
Fedora 30 : GIMP 2.10.14 with flatpak.
Flatpak is a software utility for software deployment and package management for Linux. It is advertised as offering a sandbox environment in which users can run application software in isolation from the rest of the system. see Wikipedia .
Flatpak builds available in i386, x86-64, ARM and AArch64.
Flatpak builds available in i386, x86-64, ARM and AArch64.
[root@desk mythcat]# dnf install flatpak.x86_64
Last metadata expiration check: 0:27:27 ago on Fri 01 Nov 2019 11:27:47 PM EET.
Dependencies resolved.
...
Installed:
  flatpak-1.4.3-1.fc30.x86_64
  p11-kit-server-0.23.16.1-1.fc30.x86_64
  xdg-desktop-portal-1.4.2-1.fc30.x86_64
  xdg-desktop-portal-gtk-1.4.0-1.fc30.x86_64
  flatpak-selinux-1.4.3-1.fc30.x86_64
  flatpak-session-helper-1.4.3-1.fc30.x86_64
  ostree-libs-2019.4-3.fc30.x86_64

Complete![mythcat@desk ~]$ flatpak install https://flathub.org/repo/appstream/org.gimp.GIMP.flatpakref
Note that the directories
'/var/lib/flatpak/exports/share'
'/home/mythcat/.local/share/flatpak/exports/share'
are not in the search path set by the XDG_DATA_DIRS environment variable, so applications installed by
Flatpak may not appear on your desktop until the session is restarted.
Required runtime for org.gimp.GIMP/x86_64/stable (runtime/org.gnome.Platform/x86_64/3.32) found in remote
flathub
Do you want to install it? [Y/n]: Y
org.gimp.GIMP permissions:
ipc network x11 file access [1]
dbus access [2] tags [3]
[1] /tmp, host, xdg-config/GIMP, xdg-config/gtk-3.0
[2] org.freedesktop.FileManager1, org.gtk.vfs, org.gtk.vfs.*
[3] stable
ID Arch Branch Remote Download
ID Arch Branch Remote Download
1. [✓] org.gnome.Platform x86_64 3.32 flathub 360.0 MB / 374.0 MB
2. [✓] org.gnome.Platform.Locale x86_64 3.32 flathub 17.4 kB / 320.0 MB
3. [✓] org.freedesktop.Platform.VAAPI.Intel x86_64 18.08 flathub 1.8 MB / 1.8 MB
4. [✓] org.freedesktop.Platform.html5-codecs x86_64 18.08 flathub 3.2 MB / 3.3 MB
5. [✓] org.gimp.GIMP x86_64 stable flathub 106.5 MB / 108.9 MB
Installation complete.
[mythcat@desk ~]$ flatpak update
Note that the directories
'/var/lib/flatpak/exports/share'
'/home/mythcat/.local/share/flatpak/exports/share'
are not in the search path set by the XDG_DATA_DIRS environment variable, so
applications installed by Flatpak may not appear on your desktop until the session is restarted.
Looking for updates…
Nothing to do.
[mythcat@desk ~]$ flatpak run org.gimp.GIMP//stable
Note that the directories
'/var/lib/flatpak/exports/share'
'/home/mythcat/.local/share/flatpak/exports/share'
are not in the search path set by the XDG_DATA_DIRS environment variable, so
applications installed by Flatpak may not appear on your desktop until the session is restarted.
GIMP-Error: Skipping '/home/mythcat/.var/app/org.gimp.GIMP/config/GIMP/2.10/pluginrc
wrong GIMP protocol version.
...
Tuesday, October 29, 2019
Fedora 30 : 8 Gb RAM to my old hardware.
I add another DDR3 memory RAM to my hardware for Fedora distro Linux version 30.
I will try to find a CPU gen2 for 1155 socket because is an old CPU.
This is a part of fpaste command output:

I will try to find a CPU gen2 for 1155 socket because is an old CPU.
This is a part of fpaste command output:
[mythcat@desk ~]$ sudo fpaste --sysinfo --printonly
=== fpaste 0.4.0.1 System Information (fpaste --sysinfo) ===
* OS Release (cat /etc/*-release | uniq):
     Fedora release 30 (Thirty)
     NAME=Fedora
     VERSION="30 (Server Edition)"
     ID=fedora
     VERSION_ID=30
     VERSION_CODENAME=""
...
* Kernel (uname -r ; cat /proc/cmdline):
     5.3.7-200.fc30.x86_64
* Desktop(s) Installed (ls -m /usr/share/xsessions/ | sed 's/\.desktop//g' ):
     LXDE, openbox

* SELinux Status (sestatus):
     SELinux status:                 enabled
     SELinuxfs mount:                /sys/fs/selinux
     SELinux root directory:         /etc/selinux
     Loaded policy name:             targeted
     Current mode:                   enforcing
     Mode from config file:          enforcing
     Policy MLS status:              enabled
     Policy deny_unknown status:     allowed
     Memory protection checking:     actual (secure)
     Max kernel policy version:      31

* SELinux Errors (without results: "selinuxenabled && journalctl --since yesterday |grep avc: | grep
-Eo comm="[^ ]+" | sort |uniq -c |sort -rn"):
     N/A

* CPU Model (grep 'model name' /proc/cpuinfo | awk -F: '{print $2}' | uniq -c |
         sed -re 's/^ +//' ):
     2  Intel(R) Celeron(R) CPU G1620 @ 2.70GHz

* 64-bit Support (grep -q ' lm ' /proc/cpuinfo && echo Yes || echo No):
     Yes

* Hardware Virtualization Support (grep -Eq '(vmx|svm)' /proc/cpuinfo && echo Yes || echo No):
     Yes

* Load average (uptime):
      21:42:37 up  2:46,  1 user,  load average: 0.42, 0.60, 0.90

* Memory usage (free -m):
                   total        used        free      shared  buff/cache   available
     Mem:           9694        2641        5422         189        1631        6605
     Swap:          3563           0        3563

* Top 5 CPU hogs (ps axuScnh | awk '$2!=3629' | sort -rnk3 | head -5):
         1000  2306 20.8  4.4 3620080 444832 ?      Sl   21:05   7:39 firefox
         1000  3497 17.2  0.0  16304  5284 pts/0    Ss   21:41   0:11 bash
         1000  2590 10.2  3.9 2825496 392932 ?      Sl   21:07   3:34 Web Content
         1000  2362  9.5  4.8 3206080 480436 ?      Sl   21:05   3:30 Web Content
         1000  2801  5.4  4.4 2989744 437088 ?      Sl   21:12   1:38 Web Content

* Top 5 Memory hogs (ps axuScnh | sort -rnk4 | head -5):
         1000  2362  9.5  4.8 3206080 480436 ?      Sl   21:05   3:30 Web Content
         1000  2468  3.1  4.6 2986868 466524 ?      Sl   21:05   1:09 Web Content
         1000  2801  5.4  4.4 2989744 437088 ?      Sl   21:12   1:38 Web Content
         1000  2306 20.8  4.4 3620080 444832 ?      Sl   21:05   7:39 firefox
         1000  2590 10.2  3.9 2825496 392932 ?      Sl   21:07   3:34 Web Content
...
* GL Support (glxinfo | grep -E "OpenGL version|OpenGL renderer"):
     OpenGL renderer string: NVA8
     OpenGL version string: 3.3 (Compatibility Profile) Mesa 19.1.7

* Xorg errors (without results: "grep '^\[.*(EE)' /var/log/Xorg.0.log ~/.local/share/xorg/Xorg.0.log
 | cut -d ':' -f 2- "):
     N/A

* DNF Repositories (dnf repolist):
     repo id                     repo name                                     status
     *fedora                     Fedora 30 - x86_64                            56,582
     *fedora-modular             Fedora Modular 30 - x86_64                       135
     *rpmfusion-free             RPM Fusion for Fedora 30 - Free                  616
     *rpmfusion-free-updates     RPM Fusion for Fedora 30 - Free - Updates        290
     *rpmfusion-nonfree          RPM Fusion for Fedora 30 - Nonfree               227
     *rpmfusion-nonfree-updates  RPM Fusion for Fedora 30 - Nonfree - Updates      68
     *updates                    Fedora 30 - x86_64 - Updates                  13,734
     *updates-modular            Fedora Modular 30 - x86_64 - Updates             144

...
* EFI boot manager output (without results: "efibootmgr -v"):
N/AWednesday, October 16, 2019
Fedora 30 : News about python 3.8.0 and install on Linux.
The new release of python development comes today.
You can see on the official webpage the new versions of Python 3.7.5 Oct. 15, 2019 and Python 3.8.0 Oct. 14, 2019.
I wrote about how to install version 3.8.0 on Fedora 30.
See the full tutorial here.
You can see on the official webpage the new versions of Python 3.7.5 Oct. 15, 2019 and Python 3.8.0 Oct. 14, 2019.
I wrote about how to install version 3.8.0 on Fedora 30.
See the full tutorial here.
Sunday, October 6, 2019
Fedora 30 : The paris-traceroute tool.
Today I tested two Linux tools named:paris-traceroute.
This tool can be install with dnf tool.
This tool named paris-traceroute was implemented by Xavier Cuvellier. Debugged and enhanced by Brice Augustin.
The techniques invented by the authors of Paris-traceroute to enumerate the paths of ECMP flow-based load balancing.
I used the 8.8.8.8 address to test this tool.
[root@desk mythcat]# paris-traceroute 8.8.8.8 -p icmp
...
[root@desk mythcat]# paris-traceroute 8.8.8.8 -i
...
[root@desk mythcat]# paris-traceroute 8.8.8.8 -l
...[root@desk mythcat]# paris-traceroute 8.8.8.8 -v
[DEBUG](Options.cc, 222)dst_addr = 8.8.8.8
[DEBUG](Options.cc, 340)protocol = udp
[DEBUG](Options.cc, 341)src_add =
[DEBUG](Options.cc, 342)dst_addr = 8.8.8.8
[DEBUG](Options.cc, 343)ttl_initial = 1
[DEBUG](Options.cc, 344)ttl_max = 30
[DEBUG](Options.cc, 345)tos = 0
[DEBUG](Options.cc, 346)probe_length = 0
[DEBUG](Options.cc, 347)algo = hopbyhop
[DEBUG](Options.cc, 348)timeout = 5000
[DEBUG](Options.cc, 349)delay = 50
[DEBUG](Options.cc, 350)max_try = 3
[DEBUG](Options.cc, 351)max_missing = 3
[DEBUG](Options.cc, 352)id_initial = 1
[DEBUG](Options.cc, 353)resolve = true
[DEBUG](Options.cc, 354)ipid = false
[DEBUG](Util.cc, 246)p_proto = 1
[INFO](Server.cc, 216)waiting for the first packet..
[INFO](TracertImpl.cc, 48)HopByHop algo
[INFO](TracertImpl.cc, 183)Send probe, ttl=1, id=1
[DEBUG](UDPProbe.cc, 247)==> UDP Probe :
[DEBUG](IP4Header.cc, 346)IP4 header :
[DEBUG](IP4Header.cc, 347)tos = 0
[DEBUG](IP4Header.cc, 348)total_length = 30
[DEBUG](IP4Header.cc, 349)ttl = 1
[DEBUG](IP4Header.cc, 350)protocol = 17
[DEBUG](IP4Header.cc, 353)source_address =
[DEBUG](IP4Header.cc, 355)dest_address = 8.8.8.8
[DEBUG](UDPHeader.cc, 143)UDP header :
[DEBUG](UDPHeader.cc, 144)source_port =
[DEBUG](UDPHeader.cc, 145)dest_port =
[DEBUG](UDPHeader.cc, 146)datagram_length = 10
[DEBUG](UDPHeader.cc, 147)checksum = 12584
[DEBUG](UDPProbe.cc, 250)Data :
[DEBUG]0x01 0x00
[DEBUG]0x45 0x00 0x00 0x1e 0x00 0x01 0x00 0x00
[DEBUG]0x01 0x11 0x00 0x00 0xc0 0xa8 0x00 0x8f
[DEBUG]0x08 0x08 0x08 0x08 0x82 0xb0 0x82 0xb1
[DEBUG]0x00 0x0a 0x28 0x31 0x01 0x00
[INFO](Server.cc, 276)Captured first packet!
[DEBUG](Server.cc, 280)Incoming message :
[DEBUG](Server.cc, 281)parsing.. ef72baa0 58
[DEBUG]0x45 0xc0 0x00 0x3a 0x5c 0xcd 0x00 0x00
[DEBUG]0x40 0x01 0x9b 0x55 0xc0 0xa8 0x00 0x01
[DEBUG]0xc0 0xa8 0x00 0x8f 0x0b 0x00 0xc6 0x62
[DEBUG]0x00 0x00 0x00 0x00 0x45 0x00 0x00 0x1e
[DEBUG]0x00 0x01 0x00 0x00 0x01 0x11 0xe8 0x87
[DEBUG]0xc0 0xa8 0x00 0x8f 0x08 0x08 0x08 0x08
[DEBUG]0x82 0xb0 0x82 0xb1 0x00 0x0a 0x28 0x31
[DEBUG]0x01 0x00
[DEBUG](Server.cc, 285)Incoming message parsed :
[DEBUG](IP4Header.cc, 346)IP4 header :
[DEBUG](IP4Header.cc, 347)tos = 192
[DEBUG](IP4Header.cc, 348)total_length = 58
[DEBUG](IP4Header.cc, 349)ttl = 64
[DEBUG](IP4Header.cc, 350)protocol = 1
[DEBUG](IP4Header.cc, 353)source_address =
...Friday, October 4, 2019
Fedora 30 : A general intro to linux signals with python.
UNIX/Linux systems offer special mechanisms to communicate between each individual process with signals.
Let's see these signals:
[mythcat@desk ~]$ kill -l
 1) SIGHUP  2) SIGINT  3) SIGQUIT  4) SIGILL  5) SIGTRAP
 6) SIGABRT  7) SIGBUS  8) SIGFPE  9) SIGKILL 10) SIGUSR1
11) SIGSEGV 12) SIGUSR2 13) SIGPIPE 14) SIGALRM 15) SIGTERM
16) SIGSTKFLT 17) SIGCHLD 18) SIGCONT 19) SIGSTOP 20) SIGTSTP
21) SIGTTIN 22) SIGTTOU 23) SIGURG 24) SIGXCPU 25) SIGXFSZ
26) SIGVTALRM 27) SIGPROF 28) SIGWINCH 29) SIGIO 30) SIGPWR
31) SIGSYS 34) SIGRTMIN 35) SIGRTMIN+1 36) SIGRTMIN+2 37) SIGRTMIN+3
38) SIGRTMIN+4 39) SIGRTMIN+5 40) SIGRTMIN+6 41) SIGRTMIN+7 42) SIGRTMIN+8
43) SIGRTMIN+9 44) SIGRTMIN+10 45) SIGRTMIN+11 46) SIGRTMIN+12 47) SIGRTMIN+13
48) SIGRTMIN+14 49) SIGRTMIN+15 50) SIGRTMAX-14 51) SIGRTMAX-13 52) SIGRTMAX-12
53) SIGRTMAX-11 54) SIGRTMAX-10 55) SIGRTMAX-9 56) SIGRTMAX-8 57) SIGRTMAX-7
58) SIGRTMAX-6 59) SIGRTMAX-5 60) SIGRTMAX-4 61) SIGRTMAX-3 62) SIGRTMAX-2
63) SIGRTMAX-1 64) SIGRTMAX[mythcat@desk ~]$ cat python3 signal_001.py
cat: python3: No such file or directory
import os
import sys
import time
print('PID number is:', os.getpid())
while True:
print('Waiting...')
time.sleep(6)[mythcat@desk ~]$ python3 signal_001.py
PID number is: 2566
Waiting...
Waiting...
Waiting...
Waiting...
Waiting...
Hangup[mythcat@desk ~]$ kill -SIGTERM 2566import os
import signal
import time
def receiveSignal(signalNumber, frame):
print('Received:', signalNumber)
raise SystemExit('Exiting')
return
if __name__ == '__main__':
# register the signals to be caught
signal.signal(signal.SIGHUP, receiveSignal)
signal.signal(signal.SIGINT, receiveSignal)
signal.signal(signal.SIGQUIT, receiveSignal)
signal.signal(signal.SIGILL, receiveSignal)
signal.signal(signal.SIGTRAP, receiveSignal)
signal.signal(signal.SIGABRT, receiveSignal)
signal.signal(signal.SIGBUS, receiveSignal)
signal.signal(signal.SIGFPE, receiveSignal)
#signal.signal(signal.SIGKILL, receiveSignal)
signal.signal(signal.SIGUSR1, receiveSignal)
signal.signal(signal.SIGSEGV, receiveSignal)
signal.signal(signal.SIGUSR2, receiveSignal)
signal.signal(signal.SIGPIPE, receiveSignal)
signal.signal(signal.SIGALRM, receiveSignal)
signal.signal(signal.SIGTERM, receiveSignal)
# register the signal to be caught
signal.signal(signal.SIGUSR1, receiveSignal)
# register the signal to be ignored
signal.signal(signal.SIGINT, signal.SIG_IGN)
# output current process id
print('My PID is:', os.getpid())
signal.pause()
[mythcat@desk ~]$ python3 py_pid.py
My PID is: 2698
Received: 10
Exiting[mythcat@desk ~]$ kill -SIGUSR1 2698Sunday, September 22, 2019
Fedora 30 : Detect hardware issues.
You can detect your hardware and read the health of your system using many commands and tools.
Today I show you these tools: lm_sensors-sensord.x86_64 and lshw.
Today I show you these tools: lm_sensors-sensord.x86_64 and lshw.
[root@desk mythcat]# dnf install lm_sensors-sensord.x86_64
...
Installed:
  lm_sensors-sensord-3.5.0-6.fc30.x86_64       rrdtool-1.7.2-1.fc30.x86_64
  libdbi-0.9.0-13.fc30.x86_64

Complete!
...
[root@desk mythcat]# dnf install lshw
Last metadata expiration check: 0:50:16 ago on Sun 22 Sep 2019 10:27:55 PM EEST.
Dependencies resolved.
================================================================================
 Package       Architecture    Version                   Repository        Size
================================================================================
Installing:
 lshw          x86_64          B.02.18-21.fc30           updates          315 k

Transaction Summary
================================================================================
Install  1 Package

Total download size: 315 k
Installed size: 1.1 M
Is this ok [y/N]: y
Downloading Packages:
lshw-B.02.18-21.fc30.x86_64.rpm                 598 kB/s | 315 kB     00:00
--------------------------------------------------------------------------------
Total                                            56 kB/s | 315 kB     00:05
Running transaction check
Transaction check succeeded.
Running transaction test
Transaction test succeeded.
Running transaction
  Preparing        :                                                        1/1
  Installing       : lshw-B.02.18-21.fc30.x86_64                            1/1
  Running scriptlet: lshw-B.02.18-21.fc30.x86_64                            1/1
  Verifying        : lshw-B.02.18-21.fc30.x86_64                            1/1

Installed:
  lshw-B.02.18-21.fc30.x86_64

Complete![root@desk mythcat]# sensors-detect
# sensors-detect revision $Revision$
# System: Gigabyte Technology Co., Ltd. Z68P-DS3
# Kernel: 5.2.13-200.fc30.x86_64 x86_64
# Processor: Intel(R) Celeron(R) CPU G1620 @ 2.70GHz (6/58/9)
This program will help you determine which kernel modules you need
to load to use lm_sensors most effectively. It is generally safe
and recommended to accept the default answers to all questions,
unless you know what you're doing.
Some south bridges, CPUs or memory controllers contain embedded sensors.
Do you want to scan for them? This is totally safe. (YES/no): YES
...
Driver `coretemp':
* Chip `Intel digital thermal sensor' (confidence: 9)
Driver `it87':
* ISA bus, address 0x290
Chip `ITE IT8728F Super IO Sensors' (confidence: 9)
Do you want to overwrite /etc/sysconfig/lm_sensors? (YES/no): YES
Unloading i2c-dev... OK[root@desk mythcat]# sensors
it8728-isa-0290
Adapter: ISA adapter
in0: +1.04 V (min = +0.00 V, max = +3.06 V)
in1: +2.00 V (min = +0.00 V, max = +3.06 V)
in2: +2.98 V (min = +0.00 V, max = +3.06 V)
in3: +2.96 V (min = +0.00 V, max = +3.06 V)
in4: +0.00 V (min = +0.00 V, max = +3.06 V) ALARM
in5: +0.70 V (min = +0.00 V, max = +3.06 V)
in6: +1.52 V (min = +0.00 V, max = +3.06 V)
3VSB: +3.38 V (min = +0.00 V, max = +6.12 V)
Vbat: +3.00 V
fan1: 1180 RPM (min = 0 RPM)
fan2: 0 RPM (min = 0 RPM)
fan3: 0 RPM (min = 0 RPM)
fan4: 0 RPM (min = 0 RPM)
temp1: +37.0°C (low = +127.0°C, high = +127.0°C) sensor = thermistor
temp2: +25.0°C (low = +127.0°C, high = +127.0°C) sensor = thermistor
temp3: +25.0°C (low = +127.0°C, high = +127.0°C) sensor = Intel PECI
intrusion0: ALARM
nouveau-pci-0500
Adapter: PCI adapter
GPU core: +0.90 V (min = +0.85 V, max = +1.00 V)
temp1: +42.0°C (high = +95.0°C, hyst = +3.0°C)
(crit = +105.0°C, hyst = +5.0°C)
(emerg = +135.0°C, hyst = +5.0°C)
coretemp-isa-0000
Adapter: ISA adapter
Package id 0: +37.0°C (high = +85.0°C, crit = +105.0°C)
Core 0: +36.0°C (high = +85.0°C, crit = +105.0°C)
Core 1: +37.0°C (high = +85.0°C, crit = +105.0°C)[root@desk mythcat]# lshw
desk
description: Desktop Computer
... lshw [ -version ]
lshw [ -help ]
lshw [ -X ]
lshw [ [ -html ] [ -short ] [ -xml ] [ -json ] [ -businfo ] ] [ -dump filename ] [
-class class... ] [ -disable test... ] [ -enable test... ] [ -sanitize ] [ -numeric ]
[ -quiet ]Monday, September 16, 2019
Fedora 30 : Interactive learning and reinventing the wheel in programming.
Today I returned from an activity that prompted me to find a solution to display logos.
I found this GitHub repo that I read and then turned it into a single script.
It took about an hour.

I found this GitHub repo that I read and then turned it into a single script.
It took about an hour.
Saturday, September 7, 2019
Fedora 30 : A general purpose 3D CAD modeler.
I don't use the Computer-aided design (CAD) solutions but today I tested a good one with Fedora 30.
The FreeCAD application is an open source option product design.
This is available on Linux, Windows, Mac OS X+.
The full list with all features can be found at this wiki page.
The FreeCAD application is an open source option product design.
This is available on Linux, Windows, Mac OS X+.
The full list with all features can be found at this wiki page.
[root@desk mythcat]# dnf search freecad
Last metadata expiration check: 0:14:20 ago on Sb 07 sep 2019 21:54:39 +0300.
======================== Name Exactly Matched: freecad =========================
freecad.x86_64 : A general purpose 3D CAD modeler
======================= Name & Summary Matched: freecad ========================
freecad-data.noarch : Data files for FreeCAD
[root@desk mythcat]# dnf install freecad.x86_64
Last metadata expiration check: 0:19:37 ago on Sb 07 sep 2019 21:54:39 +0300.
Dependencies resolved.
================================================================================
 Package               Arch   Version                             Repo     Size
================================================================================
Installing:
 freecad               x86_64 1:0.18.3-1.fc30                     updates  38 M
...

Complete!
[root@desk mythcat]# exit
exit
[mythcat@desk ~]$ FreeCAD
FreeCAD 0.18, Libs: 0.18RUnknown
© Juergen Riegel, Werner Mayer, Yorik van Havre 2001-2019
  #####                 ####  ###   ####
  #                    #      # #   #   #
  #     ##  #### ####  #     #   #  #   #
  ####  # # #  # #  #  #     #####  #   #
  #     #   #### ####  #    #     # #   #
  #     #   #    #     #    #     # #   #  ##  ##  ##
  #     #   #### ####   ### #     # ####   ##  ##  ##
Subscribe to:
Comments (Atom)