Pages

Showing posts with label web development. Show all posts

Monday, July 10, 2023

News : About my work and one of my websites.

I would like to bring to the attention of those who follow my activity on my websites and appreciate the inability to continue with one of the websites: free-tutorials.org. It is currently hosted on a free host, but I cannot import it 100%, which has led me not to complete it with new posts. The continuation of the activities there, considering the limited time, will be carried out on my blogs with the defined theme with which I started: Linux - Fedora, Graphics, Python, Pygame.
In the meantime, because the host is expensive and until now someone has helped me to host it on his server, it is possible to sell the domain: free-tutorials.org - I receive purchase offers at my personal Yahoo email address catafest@yahoo.com.
Minimum starting price 250 euros, because the domain is old from 2018.

Wednesday, May 4, 2022

Fedora 36 : Install django-hypergen and test it.

Today I test the last version of python version 3.11.0a7 with the Django-hypergen example.
The install process can be found on the GitHub page project.
You can see the full tutorial here.

Saturday, January 8, 2022

Fedora 35 : Testing the new Django web framework version 4.0.1 with channels.

Today I tested in Fedora 35 the new version 4.0.1 of the Django framework and the channels package.
Channels augments Django to bring WebSocket, long-poll HTTP, task offloading, and other async support to your code, using familiar Django design patterns and a flexible underlying framework that lets you not only customize behaviors but also write support for your own protocols and needs. see the GitHub website.
The entire tutorial can be viewed on my blog about python programming language.
The result shows that it works with the admin webpage:

Sunday, June 27, 2021

Fedora 34 : ASP.NET Core application - part 001.

This tutorial is about creating an ASP project on Fedora 34 Linux distro.
Let's create a folder for a new ASP project:
[mythcat@desk ~]$ cd CSharpProjects/
[mythcat@desk CSharpProjects]$ mkdir ASPProjects
[mythcat@desk CSharpProjects]$ cd ASPProjects/
[mythcat@desk ASPProjects]$ dotnet new web -o ASP001
The template "ASP.NET Core Empty" was created successfully.

Processing post-creation actions...
Running 'dotnet restore' on ASP001/ASP001.csproj...
  Determining projects to restore...
  Restored /home/mythcat/CSharpProjects/ASPProjects/ASP001/ASP001.csproj (in 152 ms).
Restore succeeded.
In the ASP001 folder project will run these commands:
[mythcat@desk ASPProjects]$ cd ASP001/
[mythcat@desk ASP001]$ dotnet restore
  Determining projects to restore...
  All projects are up-to-date for restore.
[mythcat@desk ASP001]$ dotnet run
Building...
info: Microsoft.Hosting.Lifetime[14]
      Now listening on: https://localhost:5001
This program will show
info: Microsoft.Hosting.Lifetime[14] Now listening on: http://localhost:5000 info: Microsoft.Hosting.Lifetime[0] Application started. Press Ctrl+C to shut down. info: Microsoft.Hosting.Lifetime[0] Hosting environment: Development info: Microsoft.Hosting.Lifetime[0] Content root path: /home/mythcat/CSharpProjects/ASPProjects/ASP001 ^Cinfo: Microsoft.Hosting.Lifetime[0] Application is shutting down...
This program will show on browser localhost the text: Hello World!
With the dotnet restore command, we download the necessary dependencies.
It calls into NuGet - .NET package manager to restore the tree of dependencies.
Let's see the files from this project:
[mythcat@desk ASP001]$ ls
appsettings.Development.json  ASP001.csproj  obj	 Properties
appsettings.json	      bin	     Program.cs
[mythcat@desk ASP001]$ cat Program.cs 
using System;
using Microsoft.AspNetCore.Builder;
using Microsoft.Extensions.Hosting;

var builder = WebApplication.CreateBuilder(args);
var app = builder.Build();

if (app.Environment.IsDevelopment())
{
    app.UseDeveloperExceptionPage();
}

app.MapGet("/", (Func<string>)(() => "Hello World!"));

app.Run();
[mythcat@desk ASP001]$ cat ASP001.csproj 
...
This is the most simple tutorial about the ASP project.

Tuesday, August 20, 2019

Fedora 30 : Install the last version of PHP.

I try to install the last version of PHP version 7.4.0beta2 with Fedora 30 distro the LXQt environment.
I have not used this programming language for a few years and it is a good issue to remember it.
I download teh archive from the official website and I run these commands:
[mythcat@desk ~]$ cd php/
[mythcat@desk php]$ tar -xf php-7.4.0beta2.tar.xz 
[mythcat@desk php]$ cd php-7.4.0beta2/
[mythcat@desk php-7.4.0beta2]$ ./configure --prefix=$HOME/local
checking for grep that handles long lines and -e... /usr/bin/grep
checking for egrep... /usr/bin/grep -E
checking for a sed that does not truncate output... /usr/bin/sed
checking build system type... x86_64-pc-linux-gnu
checking host system type... x86_64-pc-linux-gnu
checking target system type... x86_64-pc-linux-gnu
checking for pkg-config... /usr/bin/pkg-config
checking pkg-config is at least version 0.9.0... yes
checking for cc... no
checking for gcc... no
configure: error: in `/home/mythcat/php/php-7.4.0beta2':
configure: error: no acceptable C compiler found in $PATH
See `config.log' for more details
[mythcat@desk php-7.4.0beta2]$ vi config
[mythcat@desk php-7.4.0beta2]$ vi config
config.log    config.nice   configure     configure.ac  
[mythcat@desk php-7.4.0beta2]$ vi config.log 
Let's try to install all requests for compiler:
[root@desk home]# dnf groupinstall "Development Tools"
Let's see if these settings working well:
[root@desk home]# dnf groupinstall "Development Tools"
Waiting for process with pid 4373 to finish.
[root@desk home]# kill  -9 4373
[root@desk home]# dnf groupinstall "Development Tools"
...
Complete!
[root@desk home]# dnf install libxml2-devel.x86_64
...
Installed:
  libxml2-devel-2.9.9-2.fc30.x86_64                          xz-devel-5.2.4-5.fc30.x86_64
The last dnf command come with this output:
checking for sqlite3 > 3.7.4... no
configure: error: Package requirements (sqlite3 > 3.7.4) were not met:

Package 'sqlite3', required by 'virtual:world', not found

Consider adjusting the PKG_CONFIG_PATH environment variable if you
installed software in a non-standard prefix. 
Let's test it with an old version of sqlite:
[root@desk home]# dnf install sqlite-devel.x86_64 
...
Installed:
  sqlite-devel-3.26.0-6.fc30.x86_64 
And is working well:
[mythcat@desk php-7.4.0beta2]$ ./configure --prefix=$HOME/local
...
config.status: executing default commands

+--------------------------------------------------------------------+
| License:                                                           |
| This software is subject to the PHP License, available in this     |
| distribution in the file LICENSE. By continuing this installation  |
| process, you are bound by the terms of this license agreement.     |
| If you do not agree with the terms of this license, you must abort |
| the installation process at this point.                            |
+--------------------------------------------------------------------+

Thank you for using PHP.

[mythcat@desk php-7.4.0beta2]$ make 
... 

Build complete.
Don't forget to run 'make test'.
[mythcat@desk php-7.4.0beta2]$ make install
...
[mythcat@desk php-7.4.0beta2]$ make test
...
FAILED TEST SUMMARY
---------------------------------------------------------------------
php://fd wrapper: invalid file descriptor [ext/standard/tests/file/php_fd_wrapper_04.phpt]
=====================================================================

You may have found a problem in PHP.
This report can be automatically sent to the PHP QA team at
http://qa.php.net/reports and http://news.php.net/php.qa.reports
This gives us a better understanding of PHP's behavior.
If you don't want to send the report immediately you can choose
option "s" to save it.  You can then email it to qa-reports@lists.php.net later.
Do you want to send this report now? [Yns]: s
sh: autoconf: command not found
Please send /home/mythcat/php/php-7.4.0beta2/php_test_results_20190819_2038.txt to qa-reports@lists.php.net 
manually, thank you.
make: *** [Makefile:201: test] Error 1
[mythcat@desk php-7.4.0beta2]$ export PATH=$HOME/local/bin:$PATH
[mythcat@desk php-7.4.0beta2]$ . ~/.bash_profile
[mythcat@desk php-7.4.0beta2]$ which php
~/local/bin/php
[mythcat@desk php-7.4.0beta2]$ php -v
PHP 7.4.0beta2 (cli) (built: Aug 19 2019 23:31:07) ( NTS )
Copyright (c) The PHP Group
Zend Engine v3.4.0-dev, Copyright (c) Zend Technologies
Let's test it:
[mythcat@desk php-7.4.0beta2]$ php -i | grep 'API'
Server API => Command Line Interface
PHP API => 20190529
Zend Extension Build => API320190529,NTS
PHP Extension Build => API20190529,NTS
DOM/XML API Version => 20031129
Phar API version => 1.1.1
[mythcat@desk php-7.4.0beta2]$ echo '' > infophp.php
[mythcat@desk php-7.4.0beta2]$ php -f infophp.php 
phpinfo()
PHP Version => 7.4.0beta2

System => Linux desk 5.2.8-200.fc30.x86_64 #1 SMP Sat Aug 10 13:21:39 UTC 2019 x86_64
Build Date => Aug 19 2019 23:26:58
Configure Command =>  './configure'  '--prefix=/home/mythcat/local'
Server API => Command Line Interface
Virtual Directory Support => disabled
...
Use interactive mode and hit Ctr+D keys to run it:
[mythcat@desk php-7.4.0beta2]$ php -a
Interactive mode enabled


hello, world1636562552
I can see the compiled modules:
[mythcat@desk php-7.4.0beta2]$ php -m 
[PHP Modules]
Core
ctype
date
dom
fileinfo
filter
hash
iconv
json
libxml
pcre
PDO
pdo_sqlite
Phar
posix
Reflection
session
SimpleXML
SPL
sqlite3
standard
tokenizer
xml
xmlreader
xmlwriter

[Zend Modules]

Monday, August 12, 2019

Fedora 30 : First step with Ionic.

My laptop is crash and is hard for me to write tutorials for me.
The last tutorial I created with Fedora 30 is about Ionic.
You can read this tutorial here.

Monday, October 1, 2018

Fedora 28 : Web development with Nikola and python.

The development team comes with this info about Nikola:
Nikola is a static site and blog generator, written in Python. It can use Mako and Jinja2 templates, and input in many popular markup formats, such as reStructuredText and Markdown — and can even turn Jupyter Notebooks into blog posts! It also supports image galleries and is multilingual. Nikola is flexible, and page builds are extremely fast, courtesy of do it (which is rebuilding only what has been changed).
I tested today with Fedora 28 and python version 2.7.15.
If you take a look at Nikola handbook, you will see all the features, options and settings you need for web development.
The installation is very simple:
[mythcat@desk ~]$ pip install Nikola --user
Collecting Nikola
...
Installing collected packages: Nikola
Successfully installed Nikola-7.8.15

[mythcat@desk ~]$ nikola init mysite
[2018-10-01T14:09:02Z] WARNING: Nikola: In order to USE_BUNDLES, you must install the "webassets" Python package.
[2018-10-01T14:09:02Z] WARNING: bundles: Setting USE_BUNDLES to False.
Creating Nikola Site
====================

This is Nikola v7.8.15.  We will now ask you a few easy questions about your new site.
If you do not want to answer and want to go with the defaults instead, simply restart with the `-q` parameter.
--- Questions about the site ---
Site title [My Nikola Site]: my_website
Site author [Nikola Tesla]: catafest
Site author's e-mail [n.tesla@example.com]: catafest@yahoo.com
Site description [This is a demo site for Nikola.]: website with Nikola static sit
Site URL [https://example.com/]: http://example.com
    The URL does not end in '/' -- adding it.
Enable pretty URLs (/page/ instead of /page.html) that don't need web server configuration? [Y/n] y
--- Questions about languages and locales ---
We will now ask you to provide the list of languages you want to use.
Please list all the desired languages, comma-separated, using ISO 639-1 codes.  
The first language will be used as the default.
Type '?' (a question mark, sans quotes) to list available languages.
Language(s) to use [en]: en

Please choose the correct time zone for your blog. Nikola uses the tz database.
You can find your time zone here:
https://en.wikipedia.org/wiki/List_of_tz_database_time_zones

Time zone [Europe/Bucharest]: 
    Current time in Europe/Bucharest: 17:12:36
Use this time zone? [Y/n] y
--- Questions about comments ---
You can configure comments now.  Type '?' (a question mark, sans quotes) to list available comment systems.  
If you do not want any comments, just leave the field blank.
Comment system: 

That's it, Nikola is now configured.  Make sure to edit conf.py to your liking.
If you are looking for themes and addons, check out https://themes.getnikola.com/ and https://plugins.getnikola.com/.
Have fun!
[2018-10-01T14:12:54Z] INFO: init: Created empty site at mysite.
Now you can build and start the server with this command:
[mythcat@desk ~]$ cd mysite/
[mythcat@desk mysite]$ ls
cache  conf.py  conf.pyc  files  galleries  listings  pages  posts
[mythcat@desk mysite]$ nikola build
[2018-10-01T14:14:51Z] WARNING: Nikola: In order to USE_BUNDLES, you must install the "webassets" Python package.
[2018-10-01T14:14:51Z] WARNING: bundles: Setting USE_BUNDLES to False.
Scanning posts........done!
.  render_posts:timeline_changes
...
[2018-10-01T14:14:52Z] WARNING: Nikola: Python 2 is old and busted. Python 3 is the new hotness.
[2018-10-01T14:14:52Z] WARNING: Nikola: Nikola is going to deprecate Python 2 support in 2017. You already have Python 3
available in your system. Why not switch?

Please check http://bit.ly/1FKEsiX for details.

.  sitemap:output/sitemap.xml
.  sitemap:output/sitemapindex.xml
.  robots_file:output/robots.txt
[mythcat@desk mysite]$ nikola serve -b 
Let's see the result of this running server:
To add a post just use this command:
[mythcat@desk mysite]$ nikola new_post
[2018-10-01T14:16:09Z] WARNING: Nikola: In order to USE_BUNDLES, you must install the "webassets" Python package.
[2018-10-01T14:16:09Z] WARNING: bundles: Setting USE_BUNDLES to False.
Creating New Post
-----------------

Title: New post
Scanning posts........done!
[2018-10-01T14:16:24Z] INFO: new_post: Your post's text is at: posts/new-post.rst

[mythcat@desk mysite]$ nikola build
[2018-10-01T14:16:34Z] WARNING: Nikola: In order to USE_BUNDLES, you must install the "webassets" Python package.
[2018-10-01T14:16:34Z] WARNING: bundles: Setting USE_BUNDLES to False.
Scanning posts........done!
.  render_posts:timeline_changes
The result will be this:

There are a few themes for Nikola available at the Themes Index.
[mythcat@desk mysite]$ nikola theme -l
[2018-10-01T14:21:20Z] WARNING: Nikola: In order to USE_BUNDLES, you must install the "webassets" Python package.
[2018-10-01T14:21:20Z] WARNING: bundles: Setting USE_BUNDLES to False.
Available Themes:
-----------------
blogtxt
bnw
bootblog
bootblog-jinja
bootstrap
bootstrap-jinja
bootstrap3-gradients
bootstrap3-gradients-jinja
cadair
canterville
carpet
detox
foundation6
hack
hemingway
hpstr
hyde
jidn
lanyon
libretto
lotabout
material-theme
maupassant
mdl
monospace
oldfashioned
planetoid
readable
reveal
reveal-jinja
slidemenu
srcco.de
yesplease
zen
zen-forkawesome
zen-ipython
zen-jinja

Saturday, September 29, 2018

Fedora 28 : Integrate tinymce editor with Fedora and Django.

This is a raw tutorial about how to integrate the python module named django-tinymce with a Django project.
I used the raw word because you need to have a working Django project into your Fedora distro.
You can see my old tutorial about Django to see how to build a Django project.
About this python module, you can read more here.
The django-tinymce is a Django application that contains a widget to render a form field as a TinyMCE editor.
I have a project named trydjango with a Django application named products into my django folder.
I used activate command to activate my virtual environment:
[mythcat@desk django]$ source bin/activate
I install this python module named django-tinymce:
(django) [mythcat@desk django]$ pip install django-tinymce4-lite
Collecting django-tinymce4-lite
...
Installing collected packages: jsmin, django-tinymce4-lite
Successfully installed django-tinymce4-lite-1.7.2 jsmin-2.2.2
Let's see my folder project django named src:
(django) [mythcat@desk django]$ cd src/
(django) [mythcat@desk src]$ ll
total 136
-rw-r--r--. 1 mythcat mythcat 135168 Sep 28 12:21 db.sqlite3
-rwxrwxr-x. 1 mythcat mythcat    541 Sep 23 18:56 manage.py
drwxrwxr-x. 4 mythcat mythcat    142 Sep 26 21:45 pages
drwxrwxr-x. 4 mythcat mythcat    142 Sep 28 18:30 products
drwxrwxr-x. 3 mythcat mythcat    112 Sep 28 12:04 templates
drwxrwxr-x. 3 mythcat mythcat     93 Sep 28 12:14 trydjango
The installation is simple and star with to your settings.py and url.py file:
(django) [mythcat@desk src]$ cd trydjango/
(django) [mythcat@desk trydjango]$ vim settings.py 

INSTALLED_APPS = [
    'django.contrib.admin',
    'django.contrib.auth',
    'django.contrib.contenttypes',
    'django.contrib.sessions',
    'django.contrib.messages',
    'django.contrib.staticfiles',
    'products',
    'tinymce',
]
(django) [mythcat@desk trydjango]$ vim urls.py

from django.contrib import admin
from django.urls import path, include

from pages.views import home_view, about_view, contact_view
from products.views import product_detail_view

urlpatterns = [
    path('', home_view, name='home'),
    path('about/', about_view),
    path('contact/',contact_view),
    path('admin/',admin.site.urls),
    path('product/',product_detail_view),
    path(r'^tinymce/', include('tinymce.urls')),
This is my change I used to add the tinymce editor into my django application named products.
(django) [mythcat@desk products]$ vim models.py
from django.db import models
from tinymce.models import HTMLField

# Create your models here.
class Product(models.Model):
    title = models.CharField(max_length=120)
#    description = models.TextField(blank=True, null=True)
    description = HTMLField()
    price = models.DecimalField(decimal_places=2, max_digits=1000)
    summary = models.TextField(default='this is cool!')
You can see I used HTMLField and default come is TextField.
The result of this changes can see into the next output:

Thursday, September 27, 2018

Fedora 28 : Show a video with Google Apps Script.

It's not a tutorial specific to Fedora's distribution, but many users of this are programmers or developers and its tutorial is very useful.
The tutorial is about how to display a video in a sidebar on a Google document.
I used Google Apps Script to do this.
You can see the tutorial here.
This is a screenshot with the output of this tutorial:

Monday, September 24, 2018

Fedora 28 : Add the Fedora logo to the Google document.

I've been able to progress with Google Apps Script.
The latest tutorial with number 008.
This tutorial is about adding a logo and creating an add-on to a document in google drive.
See the full tutorial here, and result of this addon:

Sunday, September 16, 2018

Fedora 28 : Using AdonisJs web framework.

AdonisJs is a Node.js web framework with a breath of fresh air and drizzle of elegant syntax on top of it.
We prefer developer joy and stability over anything else.
I tested today this web framework named AdonisJs with Fedora 28.
The main goal was to use MySQL with MariaDB from Fedora 28 distro.
Let's start with the installation of AdonisJs on Fedora 28:
[root@desk mythcat]# npm i --global @adonisjs/cli
/usr/bin/adonis -> /usr/lib/node_modules/@adonisjs/cli/index.js
...
+ @adonisjs/cli@4.0.7
added 406 packages from 182 contributors in 33.533s
Go to the default user:
[root@desk mythcat]# exit
exit
Create the application , I named myapp:
[mythcat@desk ~]$ adonis new myapp
    _       _             _         _     
   / \   __| | ___  _ __ (_)___    | |___ 
  / _ \ / _` |/ _ \| '_ \| / __|_  | / __|
 / ___ \ (_| | (_) | | | | \__ \ |_| \__ \
/_/   \_\__,_|\___/|_| |_|_|___/\___/|___/

  [1/6] 🔬  Requirements matched [node & npm]
  [2/6] 🔦  Ensuring project directory is clean [myapp]
  [3/6] 📥  Cloned [adonisjs/adonis-fullstack-app]
  [4/6] 📦  Dependencies installed
  [5/6] 📖  Environment variables copied [.env]
  [6/6] 🔑  Key generated [adonis key:generate]

🚀   Successfully created project
👉   Get started with the following commands
Let's test the default myapp with this commands:
$ cd myapp
$ adonis serve --dev

[mythcat@desk ~]$ cd myapp
[mythcat@desk myapp]$ adonis serve --dev

 SERVER STARTED 
> Watching files for changes...

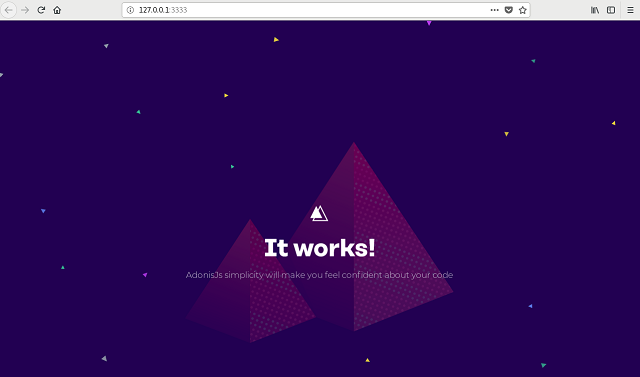
2018-09-16T09:47:46.799Z - info: serving app on http://127.0.0.1:3333
This is the result of the running myapp on 127.0.0.1:3333 web address:
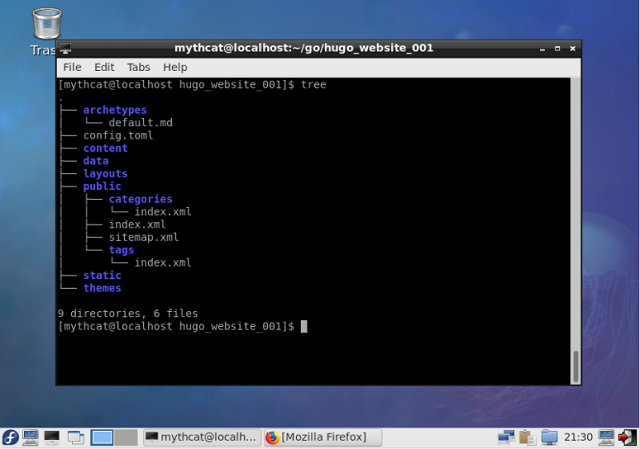
Let's see the folders and files from AdonisJS:
[mythcat@desk myapp]$ ls
ace  config    node_modules  package-lock.json  README.md  server.js
app  database  package.json  public             resources  start
The configuration for web files can be seen here:
[mythcat@desk myapp]$ vim  start/routes.js 
'use strict'

/*
|--------------------------------------------------------------------------
| Routes
|--------------------------------------------------------------------------
|
| Http routes are entry points to your web application. You can create
| routes for different URL's and bind Controller actions to them.
|
| A complete guide on routing is available here.
| http://adonisjs.com/docs/4.1/routing
|
*/

/** @type {import('@adonisjs/framework/src/Route/Manager'} */
const Route = use('Route')

Route.on('/').render('welcome')
~                                                                               
This is telling Adonis that when the root of the site is loaded, render a template/view called welcome.
That welcome template can be found in /resources/views/welcome.edge.
[mythcat@desk myapp]$ cd resources/
[mythcat@desk resources]$ ll
total 0
drwxrwxr-x. 2 mythcat mythcat 26 Sep 16 12:46 views
[mythcat@desk resources]$ cd views/
[mythcat@desk views]$ ll
total 4
-rw-rw-r--. 1 mythcat mythcat 339 Sep 16 12:46 welcome.edge
Let's see the source code of this default webpage:
[mythcat@desk views]$ vim welcome.edge 
...
For example, if you change into start/routes.js from welcome to index then you need to rename the welcome.edge to index.edge .
About css files you can make changes into public/style.css :
[mythcat@desk myapp]$ cd public/
[mythcat@desk public]$ vim  style.css


@import url('https://fonts.googleapis.com/css?family=Montserrat:300');

html, body {
  height: 100%;
  width: 100%;
}

body {
  font-family: 'Montserrat', sans-serif;
  font-weight: 300;
  background-image: url("/splash.png");
  background-color: #220052;
}

* {
  margin: 0;
  padding: 0;
}
...
Using the mysql database is simple. Into Fedora 28 distro you can use mariadb, let's install it.
[mythcat@desk myapp]$ su
Password: 
[root@desk myapp]# dnf install mariadb mariadb-server
...
Complete!
[root@desk myapp]# systemctl start mariadb
[root@desk myapp]# systemctl status mariadb
● mariadb.service - MariaDB 10.2 database server
...
You need to make changes into .env file into your project folder.
[mythcat@desk myapp]$ vim .env
HOST=127.0.0.1
PORT=3333
NODE_ENV=development
APP_URL=http://${HOST}:${PORT}
CACHE_VIEWS=false
APP_KEY=xxxxxxxxxxxxxxxx
DB_CONNECTION=sqlite
DB_HOST=127.0.0.1
DB_PORT=3306
DB_USER=root
DB_PASSWORD=
DB_DATABASE=adonis
SESSION_DRIVER=cookie
HASH_DRIVER=bcrypt
~
Use this changes for mariadb:
DB_CONNECTION=mysql
Install into AdonisJs with this command:
[mythcat@desk myapp]$ adonis install mysql
  [1/1] 📦  Dependencies installed [mysql]
Use this mysql commands to create the database:
[mythcat@desk myapp]$ mysql -u root
Welcome to the MariaDB monitor.  Commands end with ; or \g.
Your MariaDB connection id is 18
Server version: 10.2.17-MariaDB MariaDB Server

Copyright (c) 2000, 2018, Oracle, MariaDB Corporation Ab and others.

Type 'help;' or '\h' for help. Type '\c' to clear the current input statement.

MariaDB [(none)]> create database adonis;
Query OK, 1 row affected (0.11 sec)

MariaDB [(none)]> exit;
Bye 
Let's test migration command for files to allow you to create and delete tables.
[mythcat@desk myapp]$ adonis migration:run
migrate: 1503248427885_user.js
migrate: 1503248427886_token.js
Database migrated successfully in 4.11 s
[mythcat@desk myapp]$ adonis make:migration jobs
> Choose an action undefined
✔ create  database/migrations/1537095058367_jobs_schema.js
Now that our database and tables have been created, I can create a model for handling jobs table and associated data.
The next tasks to follow depends by your website:

  • Creating a Model 
  • Creating a Controller 
  • User Authentication

Monday, September 10, 2018

Fedora 28 : The Revel framework with golang.

The development team has a very effective text:
A high productivity, full-stack web framework for the Go language.
They used this words:
Revel provides routing, parameter parsing, validation, session/flash, templating, caching, job running, a testing framework, and even internationalization. I tested it yesterday and today I will show you how effective it is.
This framework is very easy to install and use it with Fedora 28.
I could say this is like django framework with the temptation style.
Let's start with a simple example into a folder created by me and named gocode:
[mythcat@desk ~]$ mkdir ~/gocode
[mythcat@desk ~]$ export GOPATH=~/gocode
[mythcat@desk ~]$ echo export GOPATH=$GOPATH >> ~/.bash_profile
[mythcat@desk ~]$ cd gocode/
[mythcat@desk gocode]$ go get github.com/revel/revel
[mythcat@desk gocode]$ ls
pkg  src
[mythcat@desk gocode]$ go get github.com/revel/cmd/revel
[mythcat@desk gocode]$ ls
bin  pkg  src
[mythcat@desk gocode]$ export PATH="$PATH:$GOPATH/bin"
[mythcat@desk gocode]$ revel helpDEBUG 19:24:09  revel  server.go:27: arguments by adding nil
~
~ revel! http://revel.github.io
~
usage: revel command [arguments]

The commands are:

    new         create a skeleton Revel application
    run         run a Revel application
    build       build a Revel application (e.g. for deployment)
    package     package a Revel application (e.g. for deployment)
    clean       clean a Revel application's temp files
    test        run all tests from the command-line
    version     displays the Revel Framework and Go version

Use "revel help [command]" for more information.
[mythcat@desk gocode]$ ls
bin  pkg  src
[mythcat@desk gocode]$ revel new myapp
DEBUG 19:38:50  revel  server.go:27: RegisterServerEngine: Registered engine 
~
~ revel! http://revel.github.io
~
Your application is ready:
   /home/mythcat/gocode/src/myapp

You can run it with:
   revel run myapp
[mythcat@desk gocode]$ revel run myapp
DEBUG 19:39:15  revel  server.go:27: RegisterServerEngine: Registered engine 
~
~ revel! http://revel.github.io
~
Trying to build with myapp (0x0,0x0)
DEBUG 19:39:15  revel module.go:152: Sorted keys  section=module keys=module.static 
...
Let's see the source code - in this case the default files: app.go and Index.html .
[mythcat@desk gocode]$ cd src/myapp/app/
[mythcat@desk app]$ ls
controllers  init.go  routes  tmp  views
[mythcat@desk app]$ cd controllers/
[mythcat@desk controllers]$ ls
app.go
[mythcat@desk controllers]$ cat app.go 
package controllers

import (
    "github.com/revel/revel"
)

type App struct {
    *revel.Controller
}

func (c App) Index() revel.Result {
    return c.Render()
}

[mythcat@desk App]$ cat Index.html 
The cat command will show the source code of Index.html file.
Let's add a golang variable named greeting to app.go and Index.html files:
[mythcat@desk controllers]$ cat app.go 
package controllers

import (
    "github.com/revel/revel"
)

type App struct {
    *revel.Controller
}

func (c App) Index() revel.Result {
    greeting := "Fedora and revel framework !"
    return c.Render(greeting)
} 
This variable greeting will will be add into file Index.html with tag p after It works!
This is result of two screenshots from start install and after I change with the variable greeting.

Thursday, March 29, 2018

Fedora 27 : Tips and tricks with hugo framework .

he most important fact in learning development is knowing the information flow and how to drain it knowing the elements and stages of information processing of the content.
That's why I wrote this article succinctly to show you how simple basics of exemplification can correctly complete and help the user to modify and create content.
I will show you how to follow steps into hugo framework and website development with hugo.
You need to read the basic of hugo terms from documentation if you want to learn all about hugo or take some helpful information.
First use --verbose flag gives extra information that will be helpful when we debug or build your hogo website.
You need to know your hugo version because is the old versions has bad issues, check it with:
$ hugo version
The next command is to see and debug your work:
$ hugo --verbose 
How hugo framework works when you start for the first time with hugo development.
Now, the first place that Hugo will look for rules and files is in the layouts/ directory so it will always find the skin.
If you start with hugo then you can change the default.
This files name skins are the files responsible for the look and feel of your site.
You have two ways to create a skin:
  • create it in the layouts/ directory;
  • create it in a sub-directory of the themes/ directory.
A skin in layouts/ folder can’t be customized without updating the templates and static files that it is built from.
The skin created in themes/ folder , can be and that makes it easier for other people to use it.
In my example tutorial , I add this text to themes/test_themes_001/layouts/index.html.
The result of running hugo server command will rput this text on your browser at 127.0.0.1:13131, see command:
$ hugo server --buildDrafts
The hugo command come with many features like :
  • --buildDrafts this include content marked as draft ( see files with draft:true from .md file);
  • --ignoreCache this ignores the cache directory if you use it;
Using --verbose let you to see your errors.
For example a bad template or configuration can come with this error:
 ...Unable to locate layout for "taxonomyTerm" ...
This show you what term created by you is not on your hugo development area.
I make just few changes to show you how the hugo working. First I create the website named hugo_website_001. I used hugo command to add some pages first_test.md and new.md and a theme named test_theme_001, see:
$ hugo new site hugo_website_001
$ cd hugo_website_001
$ hugo new theme test_theme_001
$ hugo new first_test.md
$ hugo new new.md
$ tree 
.
├── archetypes
│   └── default.md
├── config.toml
├── content
│   ├── first_test.md
│   └── new.md
├── data
├── fpaste_hugo.txt
├── layouts
├── public
│   ├── categories
│   │   └── index.xml
│   ├── css
│   ├── index.html
│   ├── index.xml
│   ├── js
│   ├── sitemap.xml
│   └── tags
│       └── index.xml
├── static
└── themes
    └── test_theme_001
        ├── archetypes
        │   └── default.md
        ├── layouts
        │   ├── 404.html
        │   ├── _default
        │   │   ├── list.html
        │   │   └── single.html
        │   ├── index.html
        │   ├── index.html.save
        │   └── partials
        │       ├── footer.html
        │       └── header.html
        ├── LICENSE.md
        ├── static
        │   ├── css
        │   └── js
        └── theme.toml

19 directories, 20 files
$ 
Let's see files for settings - the toml file type. First is the config.toml file:
baseURL = "http://localhost.com"
languageCode = "en-us"
title = "My New Hugo Site"
theme = "test_theme_001"
contentdir ="content"
publishdir = "public"
The next file is the theme.toml .

# theme.toml template for a Hugo theme
# See https://github.com/gohugoio/hugoThemes#themetoml for an example

name = "Test_theme_001"
license = "MIT"
licenselink = "https://github.com/yourname/yourtheme/blob/master/LICENSE.md"
description = "first theme with hugo"
homepage = "http://example.com/"
tags = ["tags","categories"]
features = []
min_version = "0.31"

[author]
  name = "catafest"
  homepage = "free-tutorials.org"

# If porting an existing theme
[original]
  name = ""
  homepage = ""
  repo = ""
I will show a minimal example to understand the changes you need to make to run well with hugo framework and the my custom theme.
I show next how this changes into files is show by hugo on browser.
The basic file load is the index.html from themes/test_theme_001/layouts folder with tag h2 and text Some text !, see:

Some text !


{{ partial "header.html" . }}
This file load another file from partials folder and is named header.html with tag p and this text:
This is a custom header
Let's run the hugo server :
hugo server --theme=test_theme_001 --buildDrafts --ignoreCache --disableFastRender
This is result is this:

Saturday, March 24, 2018

Fedora 27 : Testing the hugo web framework .

The development team come with this shot info: The world’s fastest framework for building websites.
I don't know if is the fastest framework but I'm sure is the fastest process to install and make settings using Fedora distro.
First you need to know this framework works with golang programming language.
Let's start testing this framework with the first step install the golang on the system.
$ sudo dnf install golang
$ mkdir -p $HOME/go
$ echo 'export GOPATH=$HOME/go' >> $HOME/.bashrc
$ source $HOME/.bashrc
$ go env GOPATH
/home/mythcat/go
Now you will have a go folder into home folder. Let's install the hugo framework.
$ cd  go
$ hugo new site hugo_website_001
$ cd hugo_website_001
$ tree
The result will the this:

The next step is the testing the hugo server with some commands:
$ hugo version
$ hugo --verbose
$ hugo server --verbose
$ hugo server
This will start the server and you can be see it at 127.0.0.1:1313. This is a bind address of the default hugo server and you need to set like any website. The file named config.toml in your site directory contains the global configuration for your Hugo site. This settings will make our website to run well. We can use one theme from a list of themes using git tool, see themes gohugo.io. If you get a theme named theme_001 you need to add it into config.toml file like:
theme = theme_001
The next step is to create some content and we can start with draft files. The draft file named first_test.md can be created with this command into hugo_website_001 folder. This will create the file into content folder.
$ hugo new first_test.md
The draf files can be render just if you use D option:
$ hugo server -D
If you don't have install or set a theme then you cannot see the draft or any content web pages. You can create a new theme (example: test_theme_001) and deal with this theme.
hugo new theme test_theme_001
If you use a theme from hugo then hugo is fastest framework, but if you need to create a new theme then for me is as fast as any framework.

Saturday, March 17, 2018

Fedora 27 : Testing the new Django web framework .

Today I tested the Django web framework version 2.0.3 with python 3 on my Fedora 27 distro.
The main reason is to see if the Django and Fedora working well.
I used the pip to install and activate the virtual environment for python. First you need to create your project into your folder. I make one folder named django_001.
$ mkdir django_001
$ cd django_001
The next step is to create and activate the virtual environment for python language and your project.
$ python3 -m venv django_001_venv
$ source django_001_venv/bin/activate
Into this virtual environment named django_001_venv you will install django web framework.
pip install django
If you have problems with update pip then update this tool. Now start the django project named django_test.
$ django-admin startproject django_test
$ cd django_test
$ python3 manage.py runserver
Open the url http://127.0.0.1:8000/ with your web browser.
The result is this:

If you try to use the admin web with password and user you will see errors.
One of the most common problem for django come from settings, let's see some file from the project:

  • manage.py - this runs project specific tasks (the django-admin is used to execute system wide Django tasks) and is used to execute project specific tasks;
  • __init__.py - this file that allows Python packages to be imported from directories where it's present and it's a generic file used in almost all Python applications;
  • settings.py - the configuration settings for the Django project;
  • urls.py - contains URL patterns for the Django project; 
  • wsgi.py - is WSGI configuration properties for the Django project ( you don't need to setup WSGI to develop Django applications).

The next step is to create first django application.
$ python manage.py startapp django_blog
This make a folder named django_blog into the main django_test folder. Into the main django_test folder you have another django_test folder with settings.py file. Add into settings.py file the django_blog application.
INSTALLED_APPS = [
    'django.contrib.admin',
    'django.contrib.auth',
    'django.contrib.contenttypes',
    'django.contrib.sessions',
    'django.contrib.messages',
    'django.contrib.staticfiles',
    'django_blog',
]
Let's fix some issues about admin and the django_blog application.
Into the main django_test folder with manage.py file use this:
$ python3 manage.py migrate
$ python3 manage.py createsuperuser

This fix the django framework and let you to add your superuser using the admin page, see:

The next issue is: create the website ( see the django_blog folder) using the Django web framework.
I don't have a issue for this django_blog but you can follow this tutorial link.

Monday, March 12, 2018

Fedora and childish ideas .

The marketing, design and promotion of any product is a key element of success.
I have to admit that although I am not an active member of Fedora distribution teams and I am glad to be able to help where it is needed.
Over the last time, I spend my online time with my son playing Roblox ( because he is away from me) and trying to show him what the computer can do for people.
This game allows development with the LUA programming language and object creation for users.
The idea that programs and games are essential factors in our lives.
Also the fact that I have been using Fedora for a long time, I have allowed myself to implement an intention to promote the Fedora distribution.
This is a shirt created with the Fedora logo and can be worn in the Roblox game. He found it here.

Tuesday, February 13, 2018

Fedora 27 : Test browsers for inline security.

Open the browser with this page: https://github.com.
Next step is to open the Developer Tools console.
If you use Opera then you can use this keys: Ctr+Shift +C .
If you use Firefox or Chrome browsers use F12 key.
Paste the following code into the console area to create a new inline script and add this java script:
var test = document.createElement('script');
test.innerText = 'alert("hi there");'
document.body.appendChild(test);
For example, this is a good security result on my Opera browser.

The result of this message tell us about the script we tried to execute was stopped by the browser.

Tuesday, August 15, 2017

News: Google with all features and options.

Not all Google options are available for all countries.
You should make a selection option depending on country and availability.
This will relieve us of unsuccessful attempts and queries to Google.
Here are all the Google options available now.

Tuesday, August 8, 2017

News: Faces of Open Source - website .

I have just discovered today this website named FACES OF OPEN SOURCE.
The development team tells us: Faces of Open Source is an on-going photographic documentation of the people behind the development and advancement of the open source revolution that has transformed the technology industry.
The area is:
  • UNIX 
  •  BSD 
  •  Linux
  •  Languages 
  •  X Windows
They also want to get a book on this subject.

Tuesday, May 23, 2017

The tool Noodl for design and web development.

This tool will help you understand something about data structuring, node building, web development and design.
This application comes with interactive lessons and documentation.
Note: I tested some lessons and are not very easy. Thus, some links between the nodes do not appear with all the labels, unless they are made inversely, in this case on the work surface the links are no longer one-way (with the arrow arrow) but only punctually between the nodes.
It can be downloaded here for the following operating systems :
  • Version 1.2.3 (MacOS)
  • Version 1.2.3 (Win x64 Installer)
  • Version 1.2.3 (Linux x86 64)
Let's see the default interface of Noodl application.