Pages

Monday, October 1, 2018

Fedora 28 : Web development with Nikola and python.

The development team comes with this info about Nikola:
Nikola is a static site and blog generator, written in Python. It can use Mako and Jinja2 templates, and input in many popular markup formats, such as reStructuredText and Markdown — and can even turn Jupyter Notebooks into blog posts! It also supports image galleries and is multilingual. Nikola is flexible, and page builds are extremely fast, courtesy of do it (which is rebuilding only what has been changed).
I tested today with Fedora 28 and python version 2.7.15.
If you take a look at Nikola handbook, you will see all the features, options and settings you need for web development.
The installation is very simple:
[mythcat@desk ~]$ pip install Nikola --user
Collecting Nikola
...
Installing collected packages: Nikola
Successfully installed Nikola-7.8.15

[mythcat@desk ~]$ nikola init mysite
[2018-10-01T14:09:02Z] WARNING: Nikola: In order to USE_BUNDLES, you must install the "webassets" Python package.
[2018-10-01T14:09:02Z] WARNING: bundles: Setting USE_BUNDLES to False.
Creating Nikola Site
====================

This is Nikola v7.8.15.  We will now ask you a few easy questions about your new site.
If you do not want to answer and want to go with the defaults instead, simply restart with the `-q` parameter.
--- Questions about the site ---
Site title [My Nikola Site]: my_website
Site author [Nikola Tesla]: catafest
Site author's e-mail [n.tesla@example.com]: catafest@yahoo.com
Site description [This is a demo site for Nikola.]: website with Nikola static sit
Site URL [https://example.com/]: http://example.com
    The URL does not end in '/' -- adding it.
Enable pretty URLs (/page/ instead of /page.html) that don't need web server configuration? [Y/n] y
--- Questions about languages and locales ---
We will now ask you to provide the list of languages you want to use.
Please list all the desired languages, comma-separated, using ISO 639-1 codes.  
The first language will be used as the default.
Type '?' (a question mark, sans quotes) to list available languages.
Language(s) to use [en]: en

Please choose the correct time zone for your blog. Nikola uses the tz database.
You can find your time zone here:
https://en.wikipedia.org/wiki/List_of_tz_database_time_zones

Time zone [Europe/Bucharest]: 
    Current time in Europe/Bucharest: 17:12:36
Use this time zone? [Y/n] y
--- Questions about comments ---
You can configure comments now.  Type '?' (a question mark, sans quotes) to list available comment systems.  
If you do not want any comments, just leave the field blank.
Comment system: 

That's it, Nikola is now configured.  Make sure to edit conf.py to your liking.
If you are looking for themes and addons, check out https://themes.getnikola.com/ and https://plugins.getnikola.com/.
Have fun!
[2018-10-01T14:12:54Z] INFO: init: Created empty site at mysite.
Now you can build and start the server with this command:
[mythcat@desk ~]$ cd mysite/
[mythcat@desk mysite]$ ls
cache  conf.py  conf.pyc  files  galleries  listings  pages  posts
[mythcat@desk mysite]$ nikola build
[2018-10-01T14:14:51Z] WARNING: Nikola: In order to USE_BUNDLES, you must install the "webassets" Python package.
[2018-10-01T14:14:51Z] WARNING: bundles: Setting USE_BUNDLES to False.
Scanning posts........done!
.  render_posts:timeline_changes
...
[2018-10-01T14:14:52Z] WARNING: Nikola: Python 2 is old and busted. Python 3 is the new hotness.
[2018-10-01T14:14:52Z] WARNING: Nikola: Nikola is going to deprecate Python 2 support in 2017. You already have Python 3
available in your system. Why not switch?

Please check http://bit.ly/1FKEsiX for details.

.  sitemap:output/sitemap.xml
.  sitemap:output/sitemapindex.xml
.  robots_file:output/robots.txt
[mythcat@desk mysite]$ nikola serve -b 
Let's see the result of this running server:
To add a post just use this command:
[mythcat@desk mysite]$ nikola new_post
[2018-10-01T14:16:09Z] WARNING: Nikola: In order to USE_BUNDLES, you must install the "webassets" Python package.
[2018-10-01T14:16:09Z] WARNING: bundles: Setting USE_BUNDLES to False.
Creating New Post
-----------------

Title: New post
Scanning posts........done!
[2018-10-01T14:16:24Z] INFO: new_post: Your post's text is at: posts/new-post.rst

[mythcat@desk mysite]$ nikola build
[2018-10-01T14:16:34Z] WARNING: Nikola: In order to USE_BUNDLES, you must install the "webassets" Python package.
[2018-10-01T14:16:34Z] WARNING: bundles: Setting USE_BUNDLES to False.
Scanning posts........done!
.  render_posts:timeline_changes
The result will be this:

There are a few themes for Nikola available at the Themes Index.
[mythcat@desk mysite]$ nikola theme -l
[2018-10-01T14:21:20Z] WARNING: Nikola: In order to USE_BUNDLES, you must install the "webassets" Python package.
[2018-10-01T14:21:20Z] WARNING: bundles: Setting USE_BUNDLES to False.
Available Themes:
-----------------
blogtxt
bnw
bootblog
bootblog-jinja
bootstrap
bootstrap-jinja
bootstrap3-gradients
bootstrap3-gradients-jinja
cadair
canterville
carpet
detox
foundation6
hack
hemingway
hpstr
hyde
jidn
lanyon
libretto
lotabout
material-theme
maupassant
mdl
monospace
oldfashioned
planetoid
readable
reveal
reveal-jinja
slidemenu
srcco.de
yesplease
zen
zen-forkawesome
zen-ipython
zen-jinja

Saturday, September 29, 2018

Fedora 28 : Integrate tinymce editor with Fedora and Django.

This is a raw tutorial about how to integrate the python module named django-tinymce with a Django project.
I used the raw word because you need to have a working Django project into your Fedora distro.
You can see my old tutorial about Django to see how to build a Django project.
About this python module, you can read more here.
The django-tinymce is a Django application that contains a widget to render a form field as a TinyMCE editor.
I have a project named trydjango with a Django application named products into my django folder.
I used activate command to activate my virtual environment:
[mythcat@desk django]$ source bin/activate
I install this python module named django-tinymce:
(django) [mythcat@desk django]$ pip install django-tinymce4-lite
Collecting django-tinymce4-lite
...
Installing collected packages: jsmin, django-tinymce4-lite
Successfully installed django-tinymce4-lite-1.7.2 jsmin-2.2.2
Let's see my folder project django named src:
(django) [mythcat@desk django]$ cd src/
(django) [mythcat@desk src]$ ll
total 136
-rw-r--r--. 1 mythcat mythcat 135168 Sep 28 12:21 db.sqlite3
-rwxrwxr-x. 1 mythcat mythcat    541 Sep 23 18:56 manage.py
drwxrwxr-x. 4 mythcat mythcat    142 Sep 26 21:45 pages
drwxrwxr-x. 4 mythcat mythcat    142 Sep 28 18:30 products
drwxrwxr-x. 3 mythcat mythcat    112 Sep 28 12:04 templates
drwxrwxr-x. 3 mythcat mythcat     93 Sep 28 12:14 trydjango
The installation is simple and star with to your settings.py and url.py file:
(django) [mythcat@desk src]$ cd trydjango/
(django) [mythcat@desk trydjango]$ vim settings.py 

INSTALLED_APPS = [
    'django.contrib.admin',
    'django.contrib.auth',
    'django.contrib.contenttypes',
    'django.contrib.sessions',
    'django.contrib.messages',
    'django.contrib.staticfiles',
    'products',
    'tinymce',
]
(django) [mythcat@desk trydjango]$ vim urls.py

from django.contrib import admin
from django.urls import path, include

from pages.views import home_view, about_view, contact_view
from products.views import product_detail_view

urlpatterns = [
    path('', home_view, name='home'),
    path('about/', about_view),
    path('contact/',contact_view),
    path('admin/',admin.site.urls),
    path('product/',product_detail_view),
    path(r'^tinymce/', include('tinymce.urls')),
This is my change I used to add the tinymce editor into my django application named products.
(django) [mythcat@desk products]$ vim models.py
from django.db import models
from tinymce.models import HTMLField

# Create your models here.
class Product(models.Model):
    title = models.CharField(max_length=120)
#    description = models.TextField(blank=True, null=True)
    description = HTMLField()
    price = models.DecimalField(decimal_places=2, max_digits=1000)
    summary = models.TextField(default='this is cool!')
You can see I used HTMLField and default come is TextField.
The result of this changes can see into the next output:

Thursday, September 27, 2018

Fedora 28 : Show a video with Google Apps Script.

It's not a tutorial specific to Fedora's distribution, but many users of this are programmers or developers and its tutorial is very useful.
The tutorial is about how to display a video in a sidebar on a Google document.
I used Google Apps Script to do this.
You can see the tutorial here.
This is a screenshot with the output of this tutorial:

Monday, September 24, 2018

Fedora 28 : Add the Fedora logo to the Google document.

I've been able to progress with Google Apps Script.
The latest tutorial with number 008.
This tutorial is about adding a logo and creating an add-on to a document in google drive.
See the full tutorial here, and result of this addon:

Sunday, September 23, 2018

Fedora 28 : Start a service daemon with Python.

In this tutorial I will starting one service using systemctl , python and systemd. First, you need to create a file named testpython.service .
[mythcat@desk system]# cd /etc/systemd/system/
[root@desk system]# vim testpython.service
This file is a configuration file for this service.
[Unit]
Description=Python Service
After=multi-user.target
[Service]
Type=simple
ExecStart=/usr/bin/python /home/mythcat/test_service.py
[Install]
WantedBy=multi-user.target
Create the python file for this service. I named test_service.py .
[root@desk system]# exit
exit
[mythcat@desk system]$ cd ~
[mythcat@desk ~]$ vim test_service.py

#!/usr/bin/env python

import logging
import time

logging.basicConfig(level="INFO")

while True:
    logging.info("Hi")
    time.sleep(3)
Change permissions file for this python file and testpython.service, see:
[mythcat@desk ~]$ chmod 764 test_service.py
Because you run this service with systemd then selinux will send you error, fix that:
[mythcat@desk ~]$ chcon -t bin_t ~/test_service.py
Reload all services and start your service with this commands:
[root@desk system]# systemctl daemon-reload
[root@desk system]# systemctl start  testpython.service
[root@desk system]# systemctl status  testpython.service
● testpython.service - Python Service
   Loaded: loaded (/etc/systemd/system/testpython.service; enabled; vendor>
   Active: active (running) since Sat 2018-09-22 21:36:23 EEST; 5s ago
 Main PID: 7213 (python)
    Tasks: 1 (limit: 2102)
   Memory: 5.7M
   CGroup: /system.slice/testpython.service
           └─7213 /usr/bin/python /home/mythcat/test_service.py

Sep 22 21:36:23 desk systemd[1]: Started Python Service.
Sep 22 21:36:24 desk python[7213]: INFO:root:Hi
Sep 22 21:36:27 desk python[7213]: INFO:root:Hi
You can use the journalctl command to see the output of this service:
[root@desk system]# journalctl -u testpython.service 
-- Logs begin at Sat 2018-09-22 20:40:06 EEST, end at Sat 2018-09-22 21:31:07 EEST. --
Sep 22 20:40:06 desk python[6232]: INFO:root:Hi
Sep 22 20:40:09 desk python[6232]: INFO:root:Hi
Sep 22 20:40:12 desk python[6232]: INFO:root:Hi
Sep 22 20:40:15 desk python[6232]: INFO:root:Hi
Sep 22 20:40:18 desk python[6232]: INFO:root:Hi
Sep 22 20:40:21 desk python[6232]: INFO:root:Hi
Sep 22 20:40:24 desk python[6232]: INFO:root:Hi
Sep 22 20:40:27 desk python[6232]: INFO:root:Hi
Sep 22 20:40:30 desk python[6232]: INFO:root:Hi
Let's see the result:

Sunday, September 16, 2018

Fedora 28 : Using AdonisJs web framework.

AdonisJs is a Node.js web framework with a breath of fresh air and drizzle of elegant syntax on top of it.
We prefer developer joy and stability over anything else.
I tested today this web framework named AdonisJs with Fedora 28.
The main goal was to use MySQL with MariaDB from Fedora 28 distro.
Let's start with the installation of AdonisJs on Fedora 28:
[root@desk mythcat]# npm i --global @adonisjs/cli
/usr/bin/adonis -> /usr/lib/node_modules/@adonisjs/cli/index.js
...
+ @adonisjs/cli@4.0.7
added 406 packages from 182 contributors in 33.533s
Go to the default user:
[root@desk mythcat]# exit
exit
Create the application , I named myapp:
[mythcat@desk ~]$ adonis new myapp
    _       _             _         _     
   / \   __| | ___  _ __ (_)___    | |___ 
  / _ \ / _` |/ _ \| '_ \| / __|_  | / __|
 / ___ \ (_| | (_) | | | | \__ \ |_| \__ \
/_/   \_\__,_|\___/|_| |_|_|___/\___/|___/

  [1/6] 🔬  Requirements matched [node & npm]
  [2/6] 🔦  Ensuring project directory is clean [myapp]
  [3/6] 📥  Cloned [adonisjs/adonis-fullstack-app]
  [4/6] 📦  Dependencies installed
  [5/6] 📖  Environment variables copied [.env]
  [6/6] 🔑  Key generated [adonis key:generate]

🚀   Successfully created project
👉   Get started with the following commands
Let's test the default myapp with this commands:
$ cd myapp
$ adonis serve --dev

[mythcat@desk ~]$ cd myapp
[mythcat@desk myapp]$ adonis serve --dev

 SERVER STARTED 
> Watching files for changes...

2018-09-16T09:47:46.799Z - info: serving app on http://127.0.0.1:3333
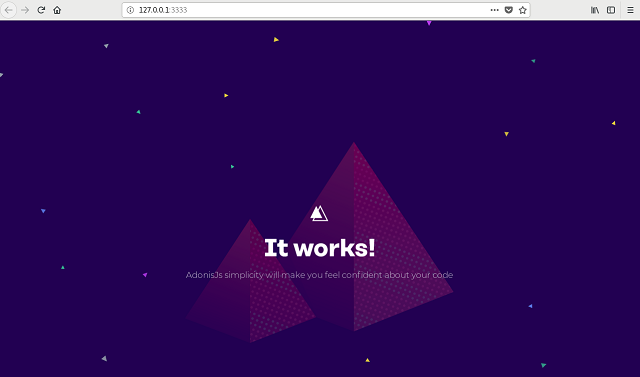
This is the result of the running myapp on 127.0.0.1:3333 web address:
Let's see the folders and files from AdonisJS:
[mythcat@desk myapp]$ ls
ace  config    node_modules  package-lock.json  README.md  server.js
app  database  package.json  public             resources  start
The configuration for web files can be seen here:
[mythcat@desk myapp]$ vim  start/routes.js 
'use strict'

/*
|--------------------------------------------------------------------------
| Routes
|--------------------------------------------------------------------------
|
| Http routes are entry points to your web application. You can create
| routes for different URL's and bind Controller actions to them.
|
| A complete guide on routing is available here.
| http://adonisjs.com/docs/4.1/routing
|
*/

/** @type {import('@adonisjs/framework/src/Route/Manager'} */
const Route = use('Route')

Route.on('/').render('welcome')
~                                                                               
This is telling Adonis that when the root of the site is loaded, render a template/view called welcome.
That welcome template can be found in /resources/views/welcome.edge.
[mythcat@desk myapp]$ cd resources/
[mythcat@desk resources]$ ll
total 0
drwxrwxr-x. 2 mythcat mythcat 26 Sep 16 12:46 views
[mythcat@desk resources]$ cd views/
[mythcat@desk views]$ ll
total 4
-rw-rw-r--. 1 mythcat mythcat 339 Sep 16 12:46 welcome.edge
Let's see the source code of this default webpage:
[mythcat@desk views]$ vim welcome.edge 
...
For example, if you change into start/routes.js from welcome to index then you need to rename the welcome.edge to index.edge .
About css files you can make changes into public/style.css :
[mythcat@desk myapp]$ cd public/
[mythcat@desk public]$ vim  style.css


@import url('https://fonts.googleapis.com/css?family=Montserrat:300');

html, body {
  height: 100%;
  width: 100%;
}

body {
  font-family: 'Montserrat', sans-serif;
  font-weight: 300;
  background-image: url("/splash.png");
  background-color: #220052;
}

* {
  margin: 0;
  padding: 0;
}
...
Using the mysql database is simple. Into Fedora 28 distro you can use mariadb, let's install it.
[mythcat@desk myapp]$ su
Password: 
[root@desk myapp]# dnf install mariadb mariadb-server
...
Complete!
[root@desk myapp]# systemctl start mariadb
[root@desk myapp]# systemctl status mariadb
● mariadb.service - MariaDB 10.2 database server
...
You need to make changes into .env file into your project folder.
[mythcat@desk myapp]$ vim .env
HOST=127.0.0.1
PORT=3333
NODE_ENV=development
APP_URL=http://${HOST}:${PORT}
CACHE_VIEWS=false
APP_KEY=xxxxxxxxxxxxxxxx
DB_CONNECTION=sqlite
DB_HOST=127.0.0.1
DB_PORT=3306
DB_USER=root
DB_PASSWORD=
DB_DATABASE=adonis
SESSION_DRIVER=cookie
HASH_DRIVER=bcrypt
~
Use this changes for mariadb:
DB_CONNECTION=mysql
Install into AdonisJs with this command:
[mythcat@desk myapp]$ adonis install mysql
  [1/1] 📦  Dependencies installed [mysql]
Use this mysql commands to create the database:
[mythcat@desk myapp]$ mysql -u root
Welcome to the MariaDB monitor.  Commands end with ; or \g.
Your MariaDB connection id is 18
Server version: 10.2.17-MariaDB MariaDB Server

Copyright (c) 2000, 2018, Oracle, MariaDB Corporation Ab and others.

Type 'help;' or '\h' for help. Type '\c' to clear the current input statement.

MariaDB [(none)]> create database adonis;
Query OK, 1 row affected (0.11 sec)

MariaDB [(none)]> exit;
Bye 
Let's test migration command for files to allow you to create and delete tables.
[mythcat@desk myapp]$ adonis migration:run
migrate: 1503248427885_user.js
migrate: 1503248427886_token.js
Database migrated successfully in 4.11 s
[mythcat@desk myapp]$ adonis make:migration jobs
> Choose an action undefined
✔ create  database/migrations/1537095058367_jobs_schema.js
Now that our database and tables have been created, I can create a model for handling jobs table and associated data.
The next tasks to follow depends by your website:

  • Creating a Model 
  • Creating a Controller 
  • User Authentication

Thursday, September 13, 2018

Fedora 28 : LibreOffice remote connection.

I wrote a tutorial about the remote connection in LibreOffice, see this article.
The main problem with LibreOffice development is the changes.
Now the feature Open remote is not working.
The bug is officially recognized and represented, see the page.
They inform us, see comment 31:
John R Mead 2017-12-17 22:43:03 UTC Well, it still doesn't work with LibreOffice Version: 6.0.0.0.beta1 (x64); I'm not providing screenshots this time since it's identical in everyway to my previous attempts. At the end of all the copy/pasting between LibreOffice and my browser to get all the relevant permissions, when I finally make the attempt to connect, I get the same message: The specified device is invalid. 

Current system configuration of potentially relevant software: 

Windows 10 Professional (x64) Version 1709 (build 16299.125) 
Java 9.0.1 
Microsoft - OneDrive version 17.25.1.0 (x64) 
LibreOffice Version: 6.0.0.0.beta1 (x64)

It's a common practice to see open-source software with bugs, most bugs are already available to users to avoid problems.
Most backup bugs are authentication and changes in development.

Monday, September 10, 2018

Fedora 28 : The Revel framework with golang.

The development team has a very effective text:
A high productivity, full-stack web framework for the Go language.
They used this words:
Revel provides routing, parameter parsing, validation, session/flash, templating, caching, job running, a testing framework, and even internationalization. I tested it yesterday and today I will show you how effective it is.
This framework is very easy to install and use it with Fedora 28.
I could say this is like django framework with the temptation style.
Let's start with a simple example into a folder created by me and named gocode:
[mythcat@desk ~]$ mkdir ~/gocode
[mythcat@desk ~]$ export GOPATH=~/gocode
[mythcat@desk ~]$ echo export GOPATH=$GOPATH >> ~/.bash_profile
[mythcat@desk ~]$ cd gocode/
[mythcat@desk gocode]$ go get github.com/revel/revel
[mythcat@desk gocode]$ ls
pkg  src
[mythcat@desk gocode]$ go get github.com/revel/cmd/revel
[mythcat@desk gocode]$ ls
bin  pkg  src
[mythcat@desk gocode]$ export PATH="$PATH:$GOPATH/bin"
[mythcat@desk gocode]$ revel helpDEBUG 19:24:09  revel  server.go:27: arguments by adding nil
~
~ revel! http://revel.github.io
~
usage: revel command [arguments]

The commands are:

    new         create a skeleton Revel application
    run         run a Revel application
    build       build a Revel application (e.g. for deployment)
    package     package a Revel application (e.g. for deployment)
    clean       clean a Revel application's temp files
    test        run all tests from the command-line
    version     displays the Revel Framework and Go version

Use "revel help [command]" for more information.
[mythcat@desk gocode]$ ls
bin  pkg  src
[mythcat@desk gocode]$ revel new myapp
DEBUG 19:38:50  revel  server.go:27: RegisterServerEngine: Registered engine 
~
~ revel! http://revel.github.io
~
Your application is ready:
   /home/mythcat/gocode/src/myapp

You can run it with:
   revel run myapp
[mythcat@desk gocode]$ revel run myapp
DEBUG 19:39:15  revel  server.go:27: RegisterServerEngine: Registered engine 
~
~ revel! http://revel.github.io
~
Trying to build with myapp (0x0,0x0)
DEBUG 19:39:15  revel module.go:152: Sorted keys  section=module keys=module.static 
...
Let's see the source code - in this case the default files: app.go and Index.html .
[mythcat@desk gocode]$ cd src/myapp/app/
[mythcat@desk app]$ ls
controllers  init.go  routes  tmp  views
[mythcat@desk app]$ cd controllers/
[mythcat@desk controllers]$ ls
app.go
[mythcat@desk controllers]$ cat app.go 
package controllers

import (
    "github.com/revel/revel"
)

type App struct {
    *revel.Controller
}

func (c App) Index() revel.Result {
    return c.Render()
}

[mythcat@desk App]$ cat Index.html 
The cat command will show the source code of Index.html file.
Let's add a golang variable named greeting to app.go and Index.html files:
[mythcat@desk controllers]$ cat app.go 
package controllers

import (
    "github.com/revel/revel"
)

type App struct {
    *revel.Controller
}

func (c App) Index() revel.Result {
    greeting := "Fedora and revel framework !"
    return c.Render(greeting)
} 
This variable greeting will will be add into file Index.html with tag p after It works!
This is result of two screenshots from start install and after I change with the variable greeting.

Thursday, August 9, 2018

Fedora 28 : Linux application with node.js and Electron packager.

Today I make a tutorial about how to use node.js and Electron packager to create cross-platform applications.
The tutorial show you how to create Windows, Linux and Mac OS cross-platform applications and can be found here.
This is result of running the linux application with Fedora 28:

Thursday, August 2, 2018

Fedora 28 : Godot example with linux .

Today I tested a simple example with the game engine named Godot version 3.0.6.
It was created on a Windows 8.1 operating system and exported as a linux application.
I moved the two files to the Fedora 28 operating system.
[mythcat@desk Godot_test_001]$ ll
total 41752
-rw-rw-r--. 1 mythcat mythcat    41092 Aug  2 18:34 Godot_test_001.pck
-rwxrwxr-x. 1 mythcat mythcat 42707653 Aug  2 18:34 Godot_test_001.x86_64
[mythcat@desk Godot_test_001]$ ./Godot_test_001.x86_64 
OpenGL ES 3.0 Renderer: Mesa DRI Intel(R) Ivybridge Desktop 
Mono: Initializing module...
The assembly mscorlib.dll was not found or could not be loaded.
It should have been installed in the `/usr/lib/mono/4.5/mscorlib.dll' directory.
The error occurred from the mono package and I fixed it with the installation using the dnf tool.
[root@desk mythcat]# dnf install mono-core.x86_64
Last metadata expiration check: 1:22:05 ago on Thu 02 Aug 2018 05:30:05 PM EEST.
Dependencies resolved.

...
Installed:
  mono-core.x86_64 4.8.0-14.fc28                 libgdiplus.x86_64 5.6-1.fc28                     
  mono-data.x86_64 4.8.0-14.fc28                 mono-data-sqlite.x86_64 4.8.0-14.fc28            
  mono-extras.x86_64 4.8.0-14.fc28               mono-mvc.x86_64 4.8.0-14.fc28                    
  mono-wcf.x86_64 4.8.0-14.fc28                  mono-web.x86_64 4.8.0-14.fc28                    
  mono-winforms.x86_64 4.8.0-14.fc28            

Complete!
Here's the final result:
[mythcat@desk Godot_test_001]$ ./Godot_test_001.x86_64 
OpenGL ES 3.0 Renderer: Mesa DRI Intel(R) Ivybridge Desktop 
Mono: Initializing module...
Mono: Runtime initialized
Mono: INITIALIZED

Wednesday, August 1, 2018

Fedora 28 : Unusual arguments for the dnf command.

Today I will introduce you in this tutorial some more unusual arguments for the dnf command.

  • first is check which package provides that file;
  • [root@desk mythcat]# dnf provides /etc/httpd/conf/httpd.conf
    Last metadata expiration check: 0:23:46 ago on Wed 01 Aug 2018 09:31:44 AM EEST.
    httpd-2.4.34-3.fc28.x86_64 : Apache HTTP Server
    Repo        : @System
    Matched from:
    Filename    : /etc/httpd/conf/httpd.conf
    
    httpd-2.4.34-3.fc28.x86_64 : Apache HTTP Server
    Repo        : updates
    Matched from:
    Filename    : /etc/httpd/conf/httpd.conf
    
    httpd-2.4.33-2.fc28.x86_64 : Apache HTTP Server
    Repo        : fedora
    Matched from:
    Filename    : /etc/httpd/conf/httpd.conf
  • get detailed information of a package can be viewed with the ‘info’ argument;
  • [root@desk mythcat]# dnf info httpd
    Last metadata expiration check: 0:29:01 ago on Wed 01 Aug 2018 09:31:44 AM EEST.
    Installed Packages
    Name         : httpd
    Version      : 2.4.34
    Release      : 3.fc28
    Arch         : x86_64
    Size         : 4.2 M
    Source       : httpd-2.4.34-3.fc28.src.rpm
    Repo         : @System
    From repo    : updates
    Summary      : Apache HTTP Server
    URL          : https://httpd.apache.org/
    License      : ASL 2.0
    Description  : The Apache HTTP Server is a powerful, efficient, and extensible
                 : web server.
  • allows us to see what has happened to our Linux system over time, and even undo, redo, or roll back a transaction;
  • [root@desk mythcat]# dnf history
    ID     | Command line             | Date and time    | Action(s)      | Altered
    -------------------------------------------------------------------------------
       178 | upgrade                  | 2018-08-01 09:33 | Update         |   27   
       177 | upgrade                  | 2018-07-31 12:54 | Update         |   11   
       176 | upgrade                  | 2018-07-30 20:43 | Update         |    1
  • take actions will be quicker with the ‘makecache’ argument
  • [root@desk mythcat]# time dnf makecache
    Last metadata expiration check: 0:34:10 ago on Wed 01 Aug 2018 09:31:44 AM EEST.
    Metadata cache created.
    
    real    0m4.529s
    user    0m1.420s
    sys    0m0.229s
  • list all packages that are currently installed on your Linux system;
  • [root@desk mythcat]# dnf list installed
    Installed Packages
    CharLS.x86_64                          1.0-16.fc28              @System         
    Field3D.x86_64                         1.7.2-10.fc28            @System         
    GConf2.x86_64                          3.2.6-20.fc28            @updates-testing
    GeoIP.x86_64                           1.6.12-3.fc28            @fedora         
    GeoIP-GeoLite-data.noarch              2018.06-1.fc28           @updates        
    ImageMagick.x86_64                     1:6.9.9.38-1.fc28        @updates-testing
    ImageMagick-c++.x86_64                 1:6.9.9.38-1.fc28        @updates-testing
    ImageMagick-libs.x86_64                1:6.9.9.38-1.fc28        @updates-testing
    LibRaw.x86_64                          0.18.13-1.fc28           @updates        
    ModemManager.x86_64                    1.6.12-3.fc28            @fedora 

Monday, June 25, 2018

Fedora 28 : Using the python module sh .

Today I test another python module named sh with python version 3.6.5 and Fedora 28.
This python module named sh is a full-fledged subprocess replacement for Python 2.6 - 3.5, PyPy and PyPy3 that allows you to call any program as if it were a function.
You can read bout this python module here.
I used dnf tool to search and install the pip tool :
[root@desk mythcat]# dnf search python3
Last metadata expiration check: 1:06:29 ago on Mon 25 Jun 2018 09:35:04 AM EEST.
======================== Name Exactly Matched: python3 =========================
...
python3.x86_64 : Interpreter of the Python programming language
Next step is the install of python programming language:
[root@desk mythcat]# dnf install python3.x86_64 
Last metadata expiration check: 1:09:12 ago on Mon 25 Jun 2018 09:35:04 AM EEST.
Package python3-3.6.5-1.fc28.x86_64 is already installed, skipping.
Dependencies resolved.
Nothing to do.
Complete!
...
I search the pip tool and then I install it:
[root@desk mythcat]# dnf search python3-pip
Last metadata expiration check: 1:15:18 ago on Mon 25 Jun 2018 09:35:04 AM EEST.
====================== Name Exactly Matched: python3-pip ======================
python3-pip.noarch : A tool for installing and managing Python3 packages
...
[root@desk mythcat]# dnf install python3-pip.noarch 
Last metadata expiration check: 1:16:31 ago on Mon 25 Jun 2018 09:35:04 AM EEST.
Package python3-pip-9.0.3-2.fc28.noarch is already installed, skipping.
Dependencies resolved.
Nothing to do.
Complete!
...
The install of this python module into user mode:
[root@desk mythcat]# exit 
exit
...
[mythcat@desk ~]$ pip3.6 install --user sh
Requirement already satisfied: sh in /usr/lib/python3.6/site-packages
See next examples and tests I used :
[mythcat@desk ~]$ python3.6
Python 3.6.5 (default, Mar 29 2018, 18:20:46) 
[GCC 8.0.1 20180317 (Red Hat 8.0.1-0.19)] on linux
Type "help", "copyright", "credits" or "license" for more information.
>>> import sh
>>> from sh import *
Traceback (most recent call last):
  File "", line 1, in 
  File "", line 1017, in _handle_fromlist
  File "/usr/lib/python3.6/site-packages/sh.py", line 3349, in __getattr__
    return self.__env[name]
  File "/usr/lib/python3.6/site-packages/sh.py", line 3187, in __getitem__
    Please import sh or import programs individually.")
RuntimeError: Cannot import * from sh. Please import sh or import programs individually.
...
>>> print(sh.ifconfig)
/usr/sbin/ifconfig
>>> print(sh.ifconfig())
...
>>> print(sh.ls())
...
>>> print(sh.ls("-l"))
...
>>> print(sh.uptime())
 11:25:03 up  1:52,  1 user,  load average: 1.10, 1.04, 1.40
...

Saturday, June 23, 2018

Fedora 28 : Starting develop with Flutter .

Today I started with another programming language Dart and Flutter.
The development team tell us about Flutter:
Flutter is Google's mobile UI framework for crafting high-quality native interfaces on iOS and Android in record time. Flutter works with existing code, is used by developers and organizations around the world, and is free and open source.
You can read more about this on official webpage:
About linux setup you can read here.
You need also to download the Android Studio I.D.E from official webpage.
You need to install some packages using dnf tool:
[mythcat@desk ~]# dnf install libstdc++.i686
[mythcat@desk ~]#  dnf install curl
Unzip theAndroid Studio I.D.E.into android-studio folder and start it to make settings for android SDK and AVD emulated device:
[mythcat@desk ~]$ cd android-studio/
[mythcat@desk android-studio]$ ls 
bin        gradle                 jre  license      NOTICE.txt
build.txt  Install-Linux-tar.txt  lib  LICENSE.txt  plugins
[mythcat@desk android-studio]$ cd bin/
[mythcat@desk bin]$ ls
appletviewer.policy  idea.properties  printenv.py         studio.sh
format.sh            inspect.sh       restart.py          studio.vmoptions
fsnotifier           lldb             studio64.vmoptions
fsnotifier64         log.xml          studio.png
[mythcat@desk bin]$ ./studio.sh 
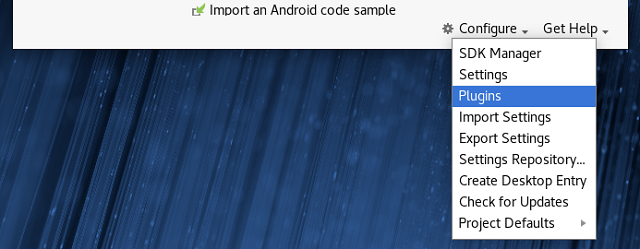
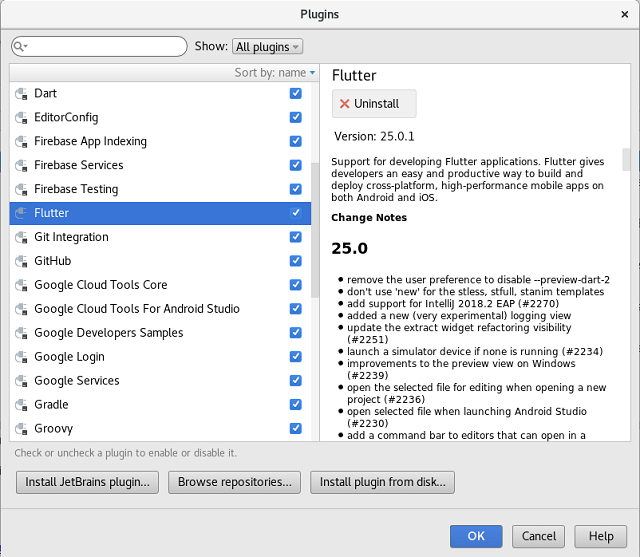
Select Plugins to add Dart and Flotter plugins:
You need to install Dart and Flotter plugins, use search:

Download and unarchive the Flutter from official webpage.
Next steps is to set the path for the Flutter and make settings for android licenses:
[mythcat@desk ~]$ export PATH=`pwd`/flutter/bin:$PATH
[mythcat@desk ~]$ cd flutter/
[mythcat@desk flutter]$ ls
analysis_options_repo.yaml  bin              flutter_console.bat  README.md
analysis_options.yaml       CONTRIBUTING.md  LICENSE              version
appveyor.yml                dev              packages
AUTHORS                     examples         PATENTS
[mythcat@desk flutter]$ cd bin/
[mythcat@desk bin]$ ls
cache  flutter  flutter.bat  internal
[mythcat@desk bin]$ ./flutter doctor --android-licenses
Warning: File /home/mythcat/.android/repositories.cfg could not be loaded.      
All SDK package licenses accepted.======] 100% Computing updates...             
[mythcat@desk bin]$ ./flutter doctor 
Doctor summary (to see all details, run flutter doctor -v):
[✓] Flutter (Channel beta, v0.5.1, on Linux, locale en_US.UTF-8)
[✓] Android toolchain - develop for Android devices (Android SDK 28.0.0)
[✓] Android Studio (version 3.1)
[!] Connected devices
    ! No devices available

! Doctor found issues in 1 category.

Use flutter command to get more help :
[mythcat@desk bin]$ ./flutter
Manage your Flutter app development.

Common commands:

  flutter create output directory=""
    Create a new Flutter project in the specified directory.

  flutter run [options]
    Run your Flutter application on an attached device or in an emulator.

Usage: flutter  [arguments]

Global options:
-h, --help            Print this usage information.
-v, --verbose         Noisy logging, including all shell commands executed.
-d, --device-id       Target device id or name (prefixes allowed).
    --version         Reports the version of this tool.
    --bug-report      Captures a bug report file to submit to the Flutter team (contains local paths, device
                      identifiers, and log snippets).

    --flutter-root    The root directory of the Flutter repository (uses $FLUTTER_ROOT if set).

Available commands:
  analyze          Analyze the project's Dart code.
  build            Flutter build commands.
  channel          List or switch flutter channels.
  clean            Delete the build/ directory.
  config           Configure Flutter settings.
  create           Create a new Flutter project.
  devices          List all connected devices.
  doctor           Show information about the installed tooling.
  drive            Runs Flutter Driver tests for the current project.
  emulators        List and launch available emulators.
  format           Format one or more dart files.
  fuchsia_reload   Hot reload on Fuchsia.
  help             Display help information for flutter.
  install          Install a Flutter app on an attached device.
  logs             Show log output for running Flutter apps.
  packages         Commands for managing Flutter packages.
  precache         Populates the Flutter tool's cache of binary artifacts.
  run              Run your Flutter app on an attached device.
  screenshot       Take a screenshot from a connected device.
  stop             Stop your Flutter app on an attached device.
  test             Run Flutter unit tests for the current project.
  trace            Start and stop tracing for a running Flutter app.
  upgrade          Upgrade your copy of Flutter.

Run "flutter help " for more information about a command. 
                                                                                                                                                                                                                                                                                                
Run "flutter help -v" for verbose help output, including less commonly used options.
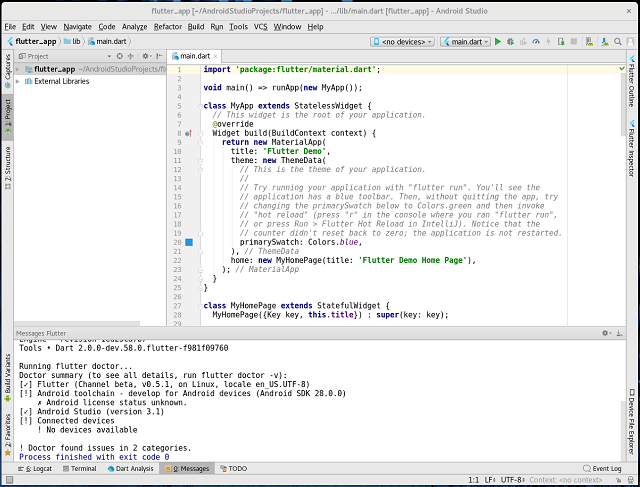
Restart the Android Studio and create your first Flutter application.
You need to have all settings for your devices or emulated AVD devices to build and develop your android application.