I wrote in some posts about this blog about the possibility of improving the distribution of Linux Fedora.
Today I discovered that choosing GNOME is a better option with lighting modes and options for the Nemo file manager actions.
I would have wanted to have a better network system similar to portmanager with S.P.N. for fedora users and team on web.
SPN (Secure Peer Name) is a technology related to secure communication protocols, particularly in the context of peer-to-peer
networks and distributed systems.
I want to have more tools and applications on tty with GUI, like ncurses... I created an radio online application with ncurses and you can find it on my pagure.
The main goal of these type of graphic user interface is simplicity, no need hardware resources - this HP Compaq 6710b has only 4Gb RAM, and cand be used with Single Board Computer.
I think Fedora don't have a Fedora Spin for Single Board Computer hardware.
Let's start with python 3 action on nemo file manager.
Go to the action folder and create an action file named: python3.nemo_action.
[root@fedora mythcat]# cd /usr/share/nemo/actions
[root@fedora actions]# nano python3.nemo_action
Add this source code :
[Nemo Action]
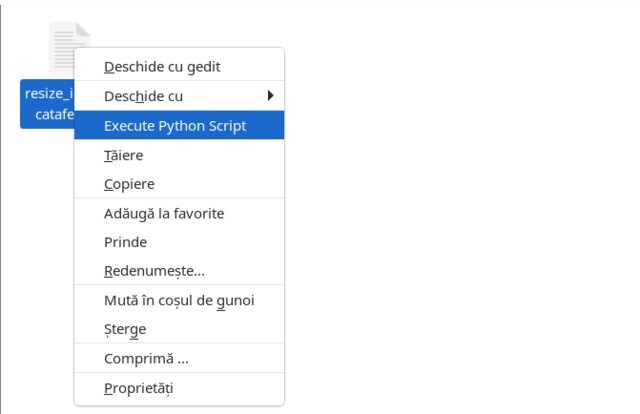
Name=Execute Python Script
Icon-Name=python
Exec=env /usr/bin/python3 %F
Selection=S
Name[tr]=Python script
Extensions=py;Reopen the Nemo file manager and you see an an Execute Python Script, only on the python script on right click menu.
Let's see some screenshots: