Pages

Wednesday, December 26, 2012

News: Tips and tricks: recursive show images

The "Mastering OpenCV with Practical Computer Vision Projects" book is done and published!
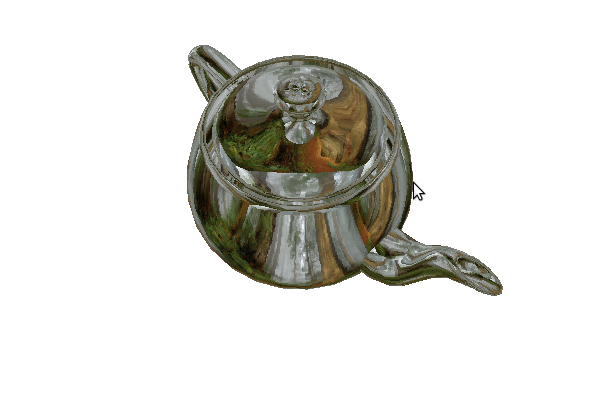
Also: including a screenshot of each project...
This will be the main issue.
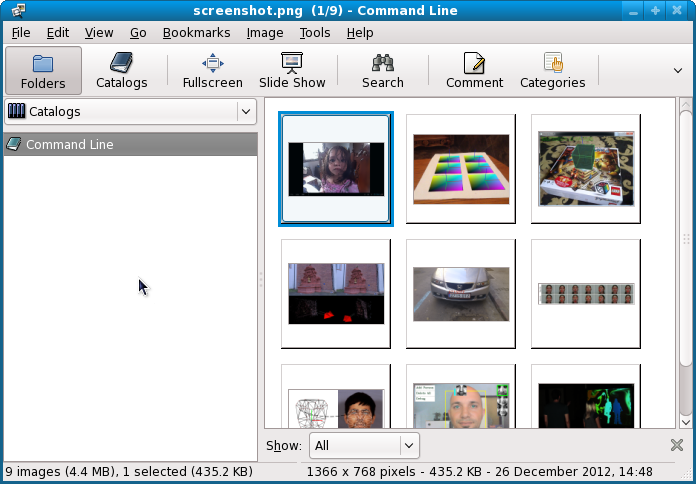
... to see the screenshot from each project
...and also to find a way for any file to use
Let's take the book and source code:
$ git clone git://github.com/MasteringOpenCV/code.git
Go to the main folder: $ cd code and use this:
code]$ ls 
Chapter1_AndroidCartoonifier     Chapter7_HeadPoseEstimation
Chapter2_iPhoneAR                Chapter8_FaceRecognition
Chapter3_MarkerlessAR            Chapter9_FluidInteractionUsingKinect
Chapter4_StructureFromMotion     LICENSE.txt
Chapter5_NumberPlateRecognition  README.md
Chapter6_NonRigidFaceTracking
If we use the tree Linux command the result will be:
.
|-- Chapter1_AndroidCartoonifier
|   |-- Cartoonifier_Android
|   |   |-- AndroidManifest.xml
|   |   |-- jni
|   |   |   |-- Android.mk
|   |   |   |-- Application.mk
|   |   |   `-- jni_part.cpp
|   |   |-- project.properties
|   |   |-- res
|   |   |   |-- drawable
|   |   |   |   `-- icon.png
|   |   |   `-- values
|   |   |       `-- strings.xml
|   |   `-- src
|   |       `-- com
|   |           `-- Cartoonifier
|   |               |-- CartoonifierApp.java
|   |               |-- CartoonifierView.java
|   |               `-- CartoonifierViewBase.java
|   |-- Cartoonifier_Desktop
|   |   |-- CMakeLists.txt
|   |   |-- ImageUtils.h
|   |   |-- ImageUtils_0.7.cpp
|   |   |-- cartoon.cpp
|   |   |-- cartoon.h
|   |   `-- main_desktop.cpp
|   |-- README.txt
|   `-- screenshot.png
|-- Chapter2_iPhoneAR
We need something to find the absolute path and give that to gthumb to run it.
First, find the screenshot:
 code]$ ls -d  $PWD/**/*.png
/home/free-tutorials/code/Chapter1_AndroidCartoonifier/screenshot.png
/home/free-tutorials/code/Chapter2_iPhoneAR/screenshot.png
/home/free-tutorials/code/Chapter3_MarkerlessAR/screenshot.png
/home/free-tutorials/code/Chapter4_StructureFromMotion/screenshot.png
/home/free-tutorials/code/Chapter5_NumberPlateRecognition/screenshot.png
/home/free-tutorials/code/Chapter6_NonRigidFaceTracking/screenshot.png
/home/free-tutorials/code/Chapter7_HeadPoseEstimation/screenshot.png
/home/free-tutorials/code/Chapter8_FaceRecognition/screenshot.png
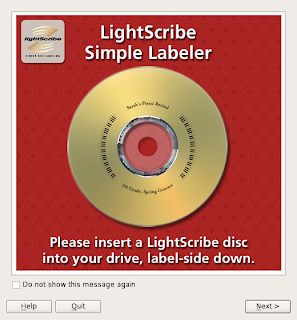
/home/free-tutorials/code/Chapter9_FluidInteractionUsingKinect/screenshot.png
Now will run gthumb with all these images:
code]$ ls -d  $PWD/**/*.png | xargs gthumb 

Tuesday, December 18, 2012

ImageMagick resize with preserve aspect ratio.

ImageMagick is used to change images.
In this case, I will show how to resize images and preserve aspect ratio:
...with height: 600 pixels
convert  -resize x600 *.png
...with width: 600 pixels
convert  -resize 600x *.png
If you know more about ImageMagick send me one email.

Tuesday, December 11, 2012

Linus Torvalds - kernel 3.7 is now out.

From: Linus Torvalds <torvalds <at> linux-foundation.org>

Subject: Linux 3.7

Newsgroups: gmane.linux.kernel

Date: 2012-12-11 03:59:50 GMT (9 hours and 45 minutes ago)

Whee. After an extra rc release, 3.7 is now out. After a few more trials at fixing things, in the end we ended up reverting the kswapd changes that caused problems. And with the extra rc, I had decided to risk doing the buffer.c cleanups that would otherwise have just been marked for stable during the next merge window, and had enough time to fix a few problems that people found there too. There's also a fix for a SCSI driver bug that was exposed by the last-minute workqueue fixes in rc8. Other than that, there's a few networking fixes, and some trivial fixes for sparc and MIPS. Anyway, it's been a somewhat drawn out release despite the 3.7 merge window having otherwise appeared pretty straightforward, and none of the rc's were all that big either. But we're done, and this means that the merge window will close on Christmas eve. Or rather, I'll probably close it a couple of days early. For obvious reasons. It's the main commercial holiday of the year, after all. So aim for winter solstice, and no later. Deal? And even then, I might be deep into the glögg. Linus

Read more here.

Monday, December 10, 2012

Simple convert images using ImageMagick - convert features

Can be done by using ImageMagick.This is a software suite to create, edit, compose, or convert bitmap images. It can read and write images in a variety of formats over 100. Using ImageMagick let you resize, flip, mirror, rotate, distort, shear and transform images, adjust image colors, apply various special effects, or draw text, lines, polygons, ellipses and Bézier curves.
Install the software under Fedora:
# yum install  ImageMagick 
Convert an image from one format to another. In this case jpeg.
$ convert *.png *.jpg
$ mogrify -format png *.jpg  
Read more about this software here.

Monday, September 24, 2012

News: Unusual commands in linux : pv

Today I will speak about pv command.
Pipe viewer - pv is a terminal-based tool for monitoring the progress of data through a pipeline written by Andrew Wood
To install pv on Fedora or CentOS do this:
$ sudo yum install pv
You can read the man file to get more help:
man pv
The result is:
NAME
       pv - monitor the progress of data through a pipe

SYNOPSIS
       pv [OPTION] [FILE]...
       pv [-h|-V]

DESCRIPTION
       pv  allows  a  user  to see the progress of data through a pipeline, by
       giving information such as time  elapsed,  percentage  completed  (with
       progress  bar),  current  throughput  rate, total data transferred, and
       ETA.

       To use it, insert it in a pipeline  between  two  processes,  with  the
       appropriate  options.  Its standard input will be passed through to its
       standard output and progress will be shown on standard error.
Let's see some examples.
You can get precise time how long it will take.
$ pv voronoi.py | python 
 737B 0:00:00 [86.9kB/s] [==================================&gt;] 100%
You can see how fast the computer reads from /dev/zero.
$ pv /dev/zero &gt; /dev/null
1.1GB 0:00:05 [   2GB/s] [    &lt;=&gt;                                            ]
You can use the dialog to show a progress bar.
To do this you need to use -n arg.
$ (pv -n /dev/zero &gt; /dev/null) 2&gt;&amp;1 | dialog --gauge "Please wait" 10 70 0

Wednesday, September 19, 2012

Make one simple kernel module using C programming language.

Today I will try to explain how to make a kernel module.
Basically, a kernel module it's one piece of code that can be loaded and unloaded into the kernel.
You can read about kernel modules from here.
Now, let's try to make a simple kernel module.
Writing your own module can be done if you know some basic rules.
First, about how to use modules.
Suppose you have a new module named kernelmoduletest.
How to load the module.
Just use this command in your module kernel folder:
#insmod kernelmoduletest.ko
Next, test the kernel module messages.
This can be done with:
#dmesg | tail
Also, you need to remove the kernel module.
$ rmmod kernelmoduletest 
ERROR: Removing 'kernelmoduletest': Operation not permitted
This means you need to have superuser rights. So use the sudo or su command.
Then use the rmmod command.
Know how to make the kernel module skeleton.
This is not very simple because you need to know many things about kernel and programming.
But you can try the test with some simple example like this example:
Create the c file named kernelmoduletest and add this source code:
#include <linux module.h="">
#include <linux kernel.h="">

MODULE_LICENSE("GPL");
MODULE_DESCRIPTION("kernelmoduletest");
MODULE_AUTHOR("Catalin George Festila/mythcat/catafest");

int init_module() {

    printk(KERN_INFO "Now I will initialize my  kernel module\n");

    printk(KERN_INFO "Test: Hello World !\n");

    return 0;
}

void cleanup_module() {

    printk(KERN_INFO "Bad!... kernel module unloaded.\n");
}</linux></linux>
Make a new file named Makefile.
Add this to tell how to compile the kernel module.
obj-m += kernelmoduletest.o
all:
 make -C /lib/modules/$(shell uname -r)/build M=$(PWD) modules
clean:
 make -C /lib/modules/$(shell uname -r)/build M=$(PWD) clean
Compile your kernel module
Just use make command.
# make
...
  Building modules, stage 2.
  MODPOST 1 modules
...
make[1]: Leaving directory `/usr/src/linux-headers-2.6.31-14-generic'
If you test your module using the commands from the top of this tutorial, you can see that:

[14694.779227] Now I will initialize my  kernel module
[14694.779233] Test: Hello World !
[15049.825605] Bad!... kernel module unloaded.
If you have already made kernel modules and the subject it's interesting for you, send me an email.
Thank you. Regards.

Sunday, September 2, 2012

News: Tips and tricks: watch and cat.

Sometimes it is necessary to find solutions.
Today's example involves two Linux commands:
watch and cat
Here is a simple method by creating a script that returns an output:
while [ 1 ]; do cat /proc/meminfo; date; echo; sleep 1; done
Make this script executable and name it: meminfo.
The output is then processed by the command:
$ watch -d ./meminfo 
This simple method can be applied to other files ...

Thursday, August 30, 2012

Using SL4A bash shell script to connect Linux with Android tablet .

Using Linux with Android OS is very simple.
I install the next two android application: sl4a_r6.apk and PythonForAndroid-r7b1.apk.
Use the PythonForAndroid-r7b1.apk just if you want to write some python scripts.
We can download it from here.
The first: sl4a_r6 it's used to write and run scripts like bash shell, HTML, Java, Python.
With this, the SL4A provides and make APIs available via JSON RPC calls.
The PythonForAndroid-r7b1 allow you to install python modules...
We can read more on this website.
Let's start with one simple bash shell script.
We will make a shell script to test the connection between Linux and Android tablet.
The connection will be through a wireless router that has opened the port through which the communication.
Tablet has Android 4.0.
We use the Linux command NC, see: nc command.
This is the script on the tablet and it will run first.
nc -l -p 7000
See the next image:

Button 1 - run the script
Button 2 - edit the script
Button 3 - save the script
Button 4 - remove the script
Use the next command with your IP on the Linux terminal.
nc xxx.xxx.xxx.xxx 7000
If you type something in your terminal you will see on a tablet.
The input from my linux terminal can be seen in the next image:

Ant this is the output on my tablet.

We can test multiple features of command nc.
I'm just curious if you have some new ideas on this subject.

Friday, August 24, 2012

News: New GTK3 theme make your Linux to look like an Android

The new GTK3 theme inspired by Android will make your Linux nicer.
reNIX Gnome Shell theme: [link]
reNIX (for Chrome/Chromium): [link]

Tuesday, August 14, 2012

News: About light laptop with your Linux distros.

ZaReason is launching a thin and light laptop called the UltraLap 430.
Linux computer builder has all the specs you’d expect from a modern ultrabook.
Prices start at $899 and it's available now from the ZaReason store.

Features:
  • 14.1" HD (1366x768) Glossy LED Backlit Display
  • 3rd Generation Intel Core Processor
  • Intel HD 4000 Graphics
  • Quick performance and power-on times with Solid State Disks
  • HD Stereo Speakers
  • 802.11 B/G/N WiFi included
  • Bluetooth
  • 3 in-1 card reader -- SD/MMC/MS supported
  • 1.3 Megapixel HD webcam included
  • Multi-gesture touchpad
Ports:
  • HDMI port
  • Gigabit Ethernet port
  • Kensington lock port
  • Headphone/Mic Jack
  • 2 USB 3.0 ports
  • 1 USB 2.0 port
Specs:
  • Your choice of a variety of Open Source operating systems, like Fedora 17
  • Battery Life: Up to 6 hrs
  • Dimensions (WxDxH): 13.5in x 9.25in x .75in
  • Weight: ~3.5 lbs

Friday, August 10, 2012

News: Google Translate Android can translate from pictures.

News about Google Translate Android.
Use camera to take a picture and brush text to translate - available on Android 2.3 and above.
Get instant translation results as you type.
Choose dialect preference for speech input.
Japanese handwriting now recognizes multiple characters at once.
Added access network state permission to check network availability when sending requests.
Try this on play.google.com

OpenGL Driver support for Linux and Windows.

NVIDIA has released a set of OpenGL 4.3 drivers for Windows and for Linux.
The driver support provides beta support for OpenGL 4.3 and GLSL 4.30 on capable hardware.
For Linux, the version number R304.15 is not the same with the drivers for Windows: R305.53.
All ARB extension specifications can be downloaded here: this page.
For OpenGL 4 capable hardware, these new extensions are provided: ARB_compute_shader ,ARB_multi_draw_indirect ,ARB_shader_image_size ,ARB_shader_storage_buffer_object
You can download all drivers from here.

Friday, July 6, 2012

Testing your disks using dd utility and time.

You can execute copies a large block of data to and from disk.

This will minimize disk caching.

Next is one example if our test system has 1GB of RAM.

It is easy ( 1GB = 250,000 blocks ).

$ time sh -c "dd if=/dev/zero of=bigfile bs=8k count=250000 && sync"
250000+0 records in
250000+0 records out
2048000000 bytes (2.0 GB) copied, 37.0113 s, 55.3 MB/s

real 0m40.910s
user 0m0.172s
sys 0m12.641s

It's very hard to argue with this dd test.

Thursday, July 5, 2012

Using DIGITAL PEN CAMERA eheV1-USB-II with mplayer

It's not my camera, I take it just to try to make working on Linux OS.
This is the device.

The dmesg tell me about this camera:
uvcvideo: Found UVC 1.00 device USB2.0 Camera
If you want to see and not to take frames, then use :
mplayer tv:// driver=v4l2:width=640:height=480:device=/dev/video0 -vo null
You can try to take some frames. I use this:
mplayer tv:// -frames 10 -tv fps=20:driver=v4l2:width=640:height=480:device=/dev/video0 -vo jpeg
The result is ten frames.
On this image I draw one line to see how working default.

And using the zoom ...

Friday, June 15, 2012

Working with old video card and also old Ogre 3D engine and Blender 3D.

I make today a new tutorial about the trips and tricks with Ogre 3D engine using Blender 3D.
If you want to see this, you can go on the tutorials part from my site.
This is the just a result of my simple example.
The result is shown in next image sample.

Thursday, June 14, 2012

News: Programming with google-blocky

It's fun. You can try or your children.
Blockly is a web-based, graphical programming language. Users can drag blocks together to build an application. No typing required.

You can see more on google project.

Saturday, May 26, 2012

Show large image like thumbnails in firefox using greasemonkey

Today I focused on a problem you often encounter.

We have a web folder containing a series of large image files. We want to see the folder that contains but would be difficult to download all the images and then view them search to find a picture of us.

I installed Greasemonkey addon and I began to study how it works.

I don't have experience with javascript programming.

I still managed to make the script below:

// ==UserScript==
// @name        show-image
// @namespace   show-image
// @description show images from files
// @include     http://*
// @version     0.1
// ==/UserScript==
var elements = document.getElementsByTagName("a");
  for (var i=0; (anchor=elements[i]); i++) {
   src = anchor.getAttribute("href");
  if (src.indexOf('.gif') > -1 || src.indexOf('.jpg') > -1 || src.indexOf('.JPG') > -1 || src.indexOf('.jpeg') > -1)
  {
    img = document.createElement('img');
    img.setAttribute('src',src);
    img.style.width='10%';
    anchor.appendChild(img);
   }
  }

You can add to show the png file by adding in the if condition in the script :

src.indexOf('.png') > -1 || src.indexOf('.PNG') > -1

I hope to help you.

Monday, May 21, 2012

News: Working with python , opengl and ARB ...

Today I test a simple script that uses the OpenGL ARB "Architecture Review Board".
The script is very simple and can be found on my graphic-3d.blogspot.com.
I make this with Python 2.6.4 , pyopengl module.

Sunday, April 1, 2012

Fedora online defragmenter for ext4 filesystem

The tool is e4defrag.
The man page tells us: reduces fragmentation of extent based file.
The file targeted by e4defrag is created on ext4 filesystem made with "-O extent" option (see mke2fs(8)). The targeted file gets more contiguous blocks and improves the file access speed.
Let's try this tool.
You can try under root account this:
# e4defrag -test -cv /home/your_user/
The final result on my account is :
Total/best extents 170276/165520 Fragmentation ratio 0.03% Fragmentation score 0.24 [0-30 no problem: 31-55 a little bit fragmented: 55- needs defrag]
Also, you have to run e4defrag with the -test parameter for now, since it isn't a fully tested version.

Monday, February 27, 2012

The LightScribe - without labels and handwriting.

LightScribe is an innovative technology that uses a special disc drive, special media, and label-making software to burn labels directly onto CDs and DVDs.
Download the packages from here.
Use the root account and install this packages :
# rpm -ivh lightscribe-1.18.24.1-linux-2.6-intel.rpm 
Preparing...                ########################################### [100%]
   1:lightscribe            ########################################### [100%]
# rpm -ivh lightscribeApplications-1.18.15.1-linux-2.6-intel.rpm 
Preparing...                ########################################### [100%]
   1:lightscribeApplicationswarning: group admin does not exist - using root%)
warning: group admin does not exist - using root
########################################### [100%]
The path application is /opt/SimpleLabeler/
See the files:
$ ll
total 332
drwxr-xr-x. 4 root wheel   4096 Feb 27 14:10 content
-rwxr-xr-x. 1 root wheel   2980 May 19  2010 launchBrowser.sh
drwxr-xr-x. 3 root wheel   4096 Feb 27 14:10 plugins
-rwxr-xr-x. 1 root wheel     43 May 19  2010 qt.conf
-rw-r--r--. 1 root root      16 May 19  2010 qttr.qm
-rwsr-xr-x. 1 root wheel 314088 May 19  2010 SimpleLabeler
-rw-r--r--. 1 root root      16 May 19  2010 simplelabelertr.qm
Run the SimpleLabeler, and you see this :

Insert the special media in the special disc drive with the face down.
This is a way to not use labels and handwriting.

Saturday, February 18, 2012

G'MIC plug-in for GIMP.

GIMP is an acronym for GNU Image Manipulation Program and it has many capabilities.
One best feature is the plugins system. Plugins may be stored in different locations depending upon your distribution.
The author of G'MIC plug-in tell us: The G'MIC plug-in for GIMP proposes a set of various filters to apply on your images, including artistic effects, image denoising, and enhancement algorithms, 3D renderers, etc.. It is a quite large plug-in, integrating a lot of different effects.
You can download the G'MIC plug-in from here.
Unzip the file and go to the folder where is the gmic_gimp file.
Use this command to copy the file in the plug-ins folder.

$ cp  gmic_gimp ~/.gimp-2.6/plug-ins/
Once you have installed the plugin just restart the GIMP.
The G'MIC will work just if you have opened an image.
You can find it on menu: Filters-> G'MIC... Also, the G'MIC plug-in has available 284 filters.