Pages

Tuesday, February 13, 2018

Fedora 27 : Test browsers for inline security.

Open the browser with this page: https://github.com.
Next step is to open the Developer Tools console.
If you use Opera then you can use this keys: Ctr+Shift +C .
If you use Firefox or Chrome browsers use F12 key.
Paste the following code into the console area to create a new inline script and add this java script:
var test = document.createElement('script');
test.innerText = 'alert("hi there");'
document.body.appendChild(test);
For example, this is a good security result on my Opera browser.

The result of this message tell us about the script we tried to execute was stopped by the browser.

Thursday, January 25, 2018

Fedora 27 : About storage management and LVM.

About storage management offering flexibility like a complex task and LVM contributes to this complexity.
If you have seen incorrect usage of LVM many times and users are often neither aware of the possibilities or alternatives for the particular storage stacks.
If you use a VirtualBox software the you can increase the vdi file:
VBoxManage modifyhd fedora.vdi --resize 30960
About LVM
The wikipedia tell us:
In Linux, Logical Volume Manager is a device mapper target that provides logical volume management for the Linux kernel. Most modern Linux distributions are LVM-aware to the point of being able to have their root file systems on a logical volume.

To create a LVM, we need to run through the following steps:
  • Select the physical storage devices for LVM 
  • Create the Volume Group from Physical Volumes 
  • Create Logical Volumes from Volume Group
All linux commands start in this case with lv and pv .
If you want to have a good management of storage then one most common task is :

The resize the PV (Physical Volume) with all free space.

All LVM commands start with lv so try to find all into your terminal by type lv ant then use keys TAB+TAB.
To resize the LVM use this commands:
$sudo su 
# pvs
  PV         VG              Fmt  Attr PSize   PFree
...
# lvdisplay
  --- Logical volume ---
  LV Path                /dev/fedora/root
  LV Name                
...
# lvextend -l+100%FREE /dev/fedora/root 
...
# df -Th
If you use Volume group on LVM then you need to use:
vgextend your_vg /dev/sda...

Wednesday, January 3, 2018

Fedora 27 : Fix your distro with package-cleanup command.

Happy New Year 2018 !
A new beginning for us, fedora distribution users, and I prefer to write about what we all use in Fedora and maybe is less well known by new  readers.
Let's start with the development process of Fedora distro come and all the installed kernels.
Normally reason why you maybe want remove kernels is limited disk space, fix problems and see what is wrong with your Fedora distro.
First issue is about installed kernels, use this command:
#rpm -q kernel
Install this package tool named dnf-utils (is a collection of add-on tool for dnf tool).
#dnf install dnf-utils
Let's start with this command, we see that several packages are seemingly installed more than once:
#package-cleanup --cleandupes
If there’s any remaining trouble with the yum database you can see with this command:
#package-cleanup --problems
To remove installed kernels from old Fedora distros use this command:
#package-cleanup --oldkernels --count=2
... the Fedora 27 use this command:
#package-cleanup --oldkernels 2
To obtain list of orphaned packages currently residing in the system:
#package-cleanup --leaves

Tuesday, December 19, 2017

Fedora 27 : Firefox and selinux : sepolgen tool .

To writing the actual policy for SELinux application, you can get many of the permissions your application needs by running.
First test if is installed into your Fedora distro.
I used Fedora 27 with SELinux set Enforcing.
If your application is named my_app then use this command:
sepolgen --init  /path/to/my_app
The result of this command will be this:
app.fc
my_app.sh
my_app.if
my_app_selinux.spec
my_app.te
If your application will be a rpm package, you can delete app.spec and app.sh.
The file with extension .te is a Type Enforcement file.

About this five files, the Linux help tells us:

Type Enforcing File NAME.te 
This file can be used to define all the types rules for a particular domain.

Note: Policy generated by sepolicy generate will automatically add a permissive DOMAIN
 to your te file. When you are satisfied that your policy works, you need to remove 
the permissive line from the te file to run your domain in enforcing mode.

Interface File NAME.if 
This file defines the interfaces for the types generated in the te file, which can 
be used by other policy domains.

File Context NAME.fc 
This file defines the default file context for the system, it takes the file types 
created in the te file and associates file paths to the types. Tools like restorecon
 and RPM will use these paths to put down labels.

RPM Spec File NAME_selinux.spec 
This file is an RPM SPEC file that can be used to install the SELinux policy on to
 machines and setup the labeling. The spec file also installs the interface file and
 a man page describing the policy. You can use sepolicy manpage -d NAME to generate 
the man page.

Shell File NAME.sh 
This is a helper shell script to compile, install and fix the labeling on your test 
system. It will also generate a man page based on the installed policy, and compile
 and build an RPM suitable to be installed on other machines
Open the my_app.te file will see something like this:
policy_module(my_app, 1.0.0)

########################################
#
# Declarations
#

type my_app_t;
type my_app_exec_t;
init_daemon_domain(my_app_t, my_app_exec_t)

# Please remove this once your policy works as expected.
permissive my_app_t;

########################################
#
# my_app local policy
#
allow my_app_t self:fifo_file rw_fifo_file_perms;
allow my_app_t self:unix_stream_socket create_stream_socket_perms;

domain_use_interactive_fds(my_app_t)
files_read_etc_files(my_app_t)
auth_use_nsswitch(my_app_t)
miscfiles_read_localization(my_app_t)
sysnet_dns_name_resolve(my_app_t)

The first line uses the name of the binary and will be the name of the policy and the version.
policy_module(my_app, 1.0.0)
The nest rows come with this:

type my_app_t;
type my_app_exec_t;
init_daemon_domain(my_app_t, my_app_exec_t)
- the unique type to describe this application is my_app_t.
- SELinux tells us we’ll be executing this file with my_app_exec_t.
- this program will run as a service: init_daemon_domain(my_app_t, my_app_exec_t).

The next row is about log permission errors ( but let the application continue to run).
permissive my_app_t;

The next rows show how the application use file permissions and if the application will use Unix steam.
Don't change it , you can get a google search to see more examples with this type of allow.
allow my_app_t self:fifo_file rw_fifo_file_perms;
allow my_app_t self:unix_stream_socket create_stream_socket_perms;

Abou this rows:
domain_use_interactive_fds(my_app_t)
files_read_etc_files(my_app_t)
auth_use_nsswitch(my_app_t)
miscfiles_read_localization(my_app_t)
sysnet_dns_name_resolve(my_app_t)

The domain_use_interactive_fds and term_use_all_terms support operations where SSH allocates a tty for the user( example the allow fifo_file supports the opposite).
The my_app want to read from /etc folder with files_read_etc_files.
The auth_use_nsswitch also can adds rules allowing access to NIS/YPBIND ports.
The miscfiles_read_localization is about localization code.

To better understand this tutorial, you can create a folder in your home directory and then test it with a different application from Fedora 27.
One good example: sepolgen --init /opt/firefox .

Sunday, December 17, 2017

Fedora 27 : Go and atom editor.

The Go programming language was created at Google in 2009 by Robert Griesemer, Rob Pike, and Ken Thompson.
The Go often referred to as golang is a programming language created at Google.
Using go with Fedora 27 is very simple , just install it with dnf tool.
#sudo dnf install golang
To use it with atom editor you need to install the atom editor , see this tutorial.
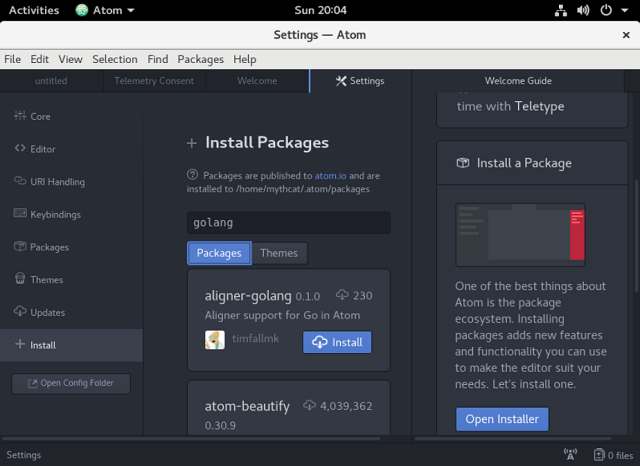
The next step is to set the atom editor with the packages for go programming language, like:
  • go-plus
  • go-get
  • go-imports
  • platformio-ide-terminal
The go command come with this help:
Go is a tool for managing Go source code.

Usage:

go command [arguments]
The commands are:

build       compile packages and dependencies
clean       remove object files
doc         show documentation for package or symbol
env         print Go environment information
bug         start a bug report
fix         run go tool fix on packages
fmt         run gofmt on package sources
generate    generate Go files by processing source
get         download and install packages and dependencies
install     compile and install packages and dependencies
list        list packages
run         compile and run Go program
test        test packages
tool        run specified go tool
version     print Go version
vet         run go tool vet on packages
Use "go help [command]" for more information about a command.

Additional help topics:

c           calling between Go and C
buildmode   description of build modes
filetype    file types
gopath      GOPATH environment variable
environment environment variables
importpath  import path syntax
packages    description of package lists
testflag    description of testing flags
testfunc    description of testing functions
The next step is to install your packages with go command and get:
go get -u golang.org/x/tools/
go get -u github.com/golang/lint/golint
Let's make a simple example:
package main
import "fmt"
func main() {
    fmt.Println("Hello world !")
}
Let's test it with go command. To run the program, create a file named hello-world.go put the code in and use go run:
$ go run hello-world.go
hello world
If you want to build our programs into binaries, we can do this using go build :
$ go build hello-world.go
$ ls
hello-world hello-world.go
Finally, we can then execute the built binary directly.
$ ./hello-world
hello world
After I searched the internet I found a website with many examples and I recommend it. You can find him here.

Thursday, December 14, 2017

Fedora 27 : Using atom editor with teletype.

The atom editor is a very good free and open-source text and source code editor for macOS, Linux, and Microsoft Windows.
This editor come with support for plug-ins written in Node.js, and embedded Git Control, developed by GitHub and more features.
Today I will show you how to install this tool with teletype into Fedora 27 distro linux.
Go to the Atom homepage from your web browser and click to download the RPM version.
Use this command to install it:
$sudo su 
#cd Download 
# dnf install atom.x86_64.rpm
Let's see this install:


The next step is to use teletype from atom.

Just install the teletype package into atom editor into settings area.
The teletype tool introduces the concept of real-time "portals" for sharing workspaces.
This tool uses WebRTC to encrypt all communication between collaborators.
Use the teletype with one click on the radio tower icon in the Atom status bar.
This will open a dialog into the right of the screen and ask you for teletype token.
You can get this token from here.
After you put the token then use the check button to share your content and atom teletype will get a ID.
Just share this ID with your development team to share your work.

Tuesday, December 12, 2017

Fedora 27 : About Cockpit linux tool.

About the Cockpit the official website tell us:
Cockpit makes Linux discoverable, allowing sysadmins to easily perform tasks such as starting containers, storage administration, network configuration, inspecting logs and so on.
If you use Fedora 27 the this tool can be used very easy.
If your Fedora Spin don't come with this tool then you can install it with this command:
#dnf -y install cockpit
First you need to follow this steps:
- starting Cockpit requires only a single command:
#systemctl start cockpit
- we’ll configure it to start on boot with:
#systemctl enable cockpit.socket
- you can check the status of Cockpit with:
#systemctl status cockpit
- the Cockpit tool runs on port 9090, so you’ll need to allow it through the firewall with this command:
#firewall-cmd --add-service=cockpit
- or simply add with the open port with:
#firewall-cmd --permanent --add-port=9090/tcp
- you now should reload the firewall for the rule to take effect:
#firewall-cmd --reload
Testing is the next step by log into Cockpit from your localhost (your server’s IP address) with your server’s root credentials.
Once you logged in you’ll see the Dashboard web page containing information about the server itself and graphs showing CPU and Memory Usage as well as Disk I/O and Network Traffic.
Let's see the Dashboard:
  • System come with infos about your system;
  • Logs displays the server’s system and service logs. That allows you to click on any entry for more detailed information, such as the process ID. 
  • Storage gives you a graphical look at disk reads and writes, and also allows you to view relevant logs. Also, you can set up and manage RAID devices and volume groups, and format, partition, and mount/unmount drives. 
  • Networking contains an overview of inbound and outbound traffic, logs and network interface information. You also can configure the network interface from this page. 
  • Containers allows you to manage your Docker containers. You can search for new containers, add or remove containers, start and stop them, and set runtime variables on this page. 
  • Accounts lets you to : add and manage users, set up and change passwords, and add and manage public SSH keys for each user. 
  • Services lists all services, and clicking on any entry takes you to a detail page showing the service log and allowing you to start/stop, enable/disable, reload/isolate, or mask/unmask each service.
  • Terminal let you a fully functional terminal, with tab completion, allowing you to perform any task you could perform through its web interface.This come with the same privileges your login credentials would allow via SSH.
You can take a look at documentation for Cockpit to learn more about this tool.